| ||
Visit MustangSteve's web site to view some of my work and find details for: FYIFORD Contributors' PICTURES - Power Brake Retrofit Kits for 65-66 Stangs - Classic Mustang FAQ's by MustangSteve - How to wire in a Duraspark Ignition - Mustang Ride Height Pictures and Descriptions - Steel Bushings to fit Granada Spindles to Mustang Tie Rods - Visit my EBAY store MustangSteve Performance - How to Install Granada Disc Brakes MustangSteve's Disc Brake Swap Page - FYIFORD Acronyms for guide to all the acronyms used on this page - FYIFORD Important information and upcoming events |
Offline
Steve - bought your brackets and pulled the axles. I know the way the setup works I have to get the old bearings off the axle and replace the retainer with the new bracket and press new bearings on. However my bearings have about 200 miles on them, so I was thinking and I wonder if all this is necessary.
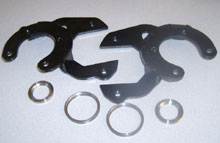
If the bracket wasn't completely circular but more of a "c" I could just cut the old retainer off (or leave it on) and slip your bracket on and not touch the bearings. Something like this:
Or this:
So could I just mod the bracket a bit and cut a slice out of it? Would it ruin the structural integrity?
Thanks
Bob
Last edited by rbtconsultants (3/01/2015 12:22 AM)
Offline
Here is my philosophy on that. The bracket has a machined groove in the back to capture the bearing 360 degrees around its perimeter. There is a slight amount of crush applied. About 0.002" but there is some. If you remove the crush on part of the bearing perimeter, there might be some distortion in the bearing for the unsupported area. I prefer to have the bearing 100% supported. The other bracket sets you show are cut to make them easy to install, not to protect the longevity of your parts.
This fits right in with my favorite MustangSteve saying:I refuse to sacrifice functionality for ease of installation. With my parts, you might complain the day you install them because it was a bit of work, but you will enjoy the superior performance from now on. With a lot of the aftermarket stuff designed to “bolt on”, you will enjoy one day of easy installation but then complain about the lack of performance from now on.
Do it right.
Do it once.
I would replace the bearings.
Offline
Just to close the loop, Steve, I took your advice and used it as an excuse to buy a press :-)
Offline
So, I love the GT brakes. They stop fantastically. Such a good pedal with the 13.2" GT brakes up front also.
I used lokar cables that I already had for the crappy eldorado calipers I'm discarding. The cable needed to loop under the axle, and I needed a big washer for the caliper e brake bracket and I had to slide a cable stop onto the cable since it needed a "barrel" type end and the Lokar cable had a ball type end. So now the ball holds the drum-shaped cable stop on. Worked great.
Oh, and just for fun we used a 2" linear actuator for the ebrake with push button activation, and the e brake will lock up the wheels while we're moving.
Note the glowing red button on the console below. That's the e brake engaged :-)
Last edited by rbtconsultants (4/06/2015 3:06 PM)
Offline
Very nice interior.
Offline
Hey RB...please tell me more about the linear actuator. I've been wondering if one of those would supply enough torque to actuate the Exploder parking brakes. I have BB'd my stock P-brake system to work with the 'sploder stuff but a push button would be much nicer...'specialy for Jean. Also, does the actuator have to remain energize or is the a latching mechanism?
Any info greatly appreciated.
BB
Offline
Thanks tj. Fiero seats. We're still getting the interior in. I'll take more pics.
Bob - I also need to take pics of the e brake install. I bought lokar cables and a 2" linear actuator 200 lb. Pull iirc. A linear actuator is actually a screw on a motor. When you cut power it stays put. When it hits is limit it cuts is own power.
So the latching button is wired to a double relay so it reverses polarity to move actuator in or out and when it hits its limit it turns off. The button has independent power for its led and that is ignition switched so the light turns off when the ignition is off. The power to the actuator is also ignition switched so it won't release without ignition power.
The actuator and cable brackets are mounted under the trunk behind the passenger wheel well. I mounted 1.5" wide, 3/8" Thick steel flat bar from home Depot in the trunk and bolts up through the trunk floor to the flatbar to prevent anything from bending under stress. Cables run under the trunk to the calipers.A bit of closed cell sound insulating foam wrapped around the actuator to keep it from banging around.
Hope that helps. I'll get some pics.
Bob
Offline
Ok, I checked and it's 225 pound pull. I got this particular one as it appears to be better suited to the elements. It had no trouble this past winter in ice, snow and salt.
The cables, mounting brackets, actuator, flat bar, button all came to ~$200, which is way less than $450 for e-stopp.
Bob
Offline
rbtconsultants wrote:
Hope that helps. I'll get some pics.
Looking good! And yes, pics of that brake actuator setup - slick!
Offline
Excellent innovation !
Offline
Please pics of the brake actuator setup. Very Interested!!!
Offline
RBT, thank you for the info. That just looks like a really cool winter project in the making. The thought of doing something like that has passed briefly through my little pea brain but at the time I was thinking of a linear motor...entirely different animal, I think.
Cool, thanks again.
BB
Offline
Fiero seats,huh?!! Was it a bolt in or lotsa "modding"?
They come wth speakers in the head rests,right?!
Offline
I'm out of town til Friday. I'll grab e brake pics this weekend.
The fiero seats were not hard. Got them for 50 bucks. We mounted the tracks by drilling some holes in some steel flatbar and attaching the original mustang tracks to the flatbar with bolts and nylon spacers and bolting the flatbar to the bottom of the seats. There is a thread somewhere that i found with Google that describes it with pics. I just followed that thread so not my idea. Apparently lots of folks have used fiero seats. They are awesomely comfortable and fit just right. Work great with 3 point seat belts.
We had front and back seat upholstery made by mrmikes.com. We reupholstered the seats ourselves. I have a couple threads about doing that over on vintage mustang forums. We don't use the speakers in the headrests but you can, and Mike will even put the speaker holes in the upholstery If you want. I can't say enough good things about Mr Mike.
Bob
Offline
I helped a coworker install a kit he got from Speedway for electric E-brake and it was simple. We hid the switch for one more level of security.
Offline
$400+ from speedway for a linear actuator in a box with cables and a button. I originally built mine with the actuator in a steel toolbox, but I like the direction I ended up with better, and for half the price.
Bob
Offline
Hey - what ever happened to the pics?!?
Offline
Sorry. Busy week. I'll grab some in the morning.
Bob
Offline
OK, so I grabbed some quick pics. this is the actuator mounted under the trunk floor between the framerail and gas tank. Too little room to get the whole thing in one pic. Note that you can't see it in the pic, but I had to drill one hole in the center of the cable bracket for the mount bolt through the trunk floor because the two holes on the tabs were too wide for the flat bar mount.
And here is one of the brace in the trunk and relay wiring. The brace is to prevent the trunk floor from bending under the stress. Haven't cleaned up or painted anything under there yet.
If I was to do this again, I would likely mount the actuator and cable brackets on the bar as a unit (and use a wider bar so I wouldn't have to drill another mounting hole in the cable bracket) , and then bolt the whole unit underneath with just some nuts and washers in the trunk. However, we are going to soundproof and carpet the trunk, so it will be hidden anyway, so I didn't feel like redoing it.
I forgot to get a pic of the cables going to the calipers, but it doesn't really matter. Assume your brake cables will be cut to length and run along underneath the car to the brakes. Not terribly tricky. I used Lokar cable kit but you can get the cable brackets/etc. separately on the interwebs
As far as wiring goes, just google for wiring a polarity reversing relay circuit. I did it with a DPDT but you could just as easily use two regular relays:
I used a light up button. You could use most any button based on your circuit setup.
The tail of the actuator is mounted using this:
You can get adjustable actuators but I found 2 inches to be good. I linked to that up above in the thread.
So, ultimately it is not the most elegant implementation, but it works great and if you were to do one and learn from our hindsiight you could do it more elegantly.
Bob
REMEMBER!!! When posting a question about your Mustang or other Ford on this forum, BE SURE to tell us what it is, what year, engine, etc so we have enough information to go on. |