FYI FORD - MustangSteve's Ford Mustang Forum
The Internet's Most Knowledgeable Classic Mustang Information
IF YOU HAVE A QUESTION ABOUT CLASSIC FORD MUSTANGS, YOU HAVE COME TO THE RIGHT PLACE!
MustangSteve has over 30 years of Mustang experience, having owned 30 of them and restored several others. With the help of other Mustangers, this site is dedicated to helping anyone wanting to restore or modify their Mustang.... THERE ARE NO DUMB QUESTIONS!!!!!
Visit MustangSteve's web site to view some of my work and find details for:
FYIFORD Contributors' PICTURES - Power Brake Retrofit Kits for 65-66 Stangs - Classic Mustang FAQ's by MustangSteve - How to wire in a Duraspark Ignition - Mustang Ride Height Pictures and Descriptions - Steel Bushings to fit Granada Spindles to Mustang Tie Rods - Visit my EBAY store MustangSteve Performance - How to Install Granada Disc Brakes MustangSteve's Disc Brake Swap Page - FYIFORD Acronyms for guide to all the acronyms used on this page - FYIFORD Important information and upcoming events

You are not logged in. Would you like to login or register?

8/07/2016 1:10 PM  #26


Re: My Cars

I bought a 3/8” fuel line for a 68 to install. It was a little tricky getting it around the subframe connectors, but it went. Had to drill a few holes also. 
 

Pic 1344

The front brakes use MS’s GT brackets. I got take off calipers, hoses, dust shields, and pads in 13 or 14, when they were still available. Everything bolted up good. I used the late model hoses supplied with the calipers. Just like the back, I rounded off the extra connectors for holding the ABS cable. A little cutting, filling, and drilling got the bracket on the end ready for bolting to the car.
 

Pic 1345

Years ago, (I’ve been buying parts since 04 as money was available) I bought the pre bent brake lines for a disk brake car, mine original had drums. The decision made since at the time cause I wanted disc!! I’m not sure if it was the mid-year change or the difference in a drum and disc car, but the line to the rear wasn’t bent to fit my car. The front lines wasn’t working out either. So, another set of brake lines were bought. Those fit much better. I think I’m fair at bending the tubing, but didn’t want the hassle for the entire car and I was dreading flaring the ends. The more factory ends the better.  Had issues with that in the 90’s and haven’t done it since.
 
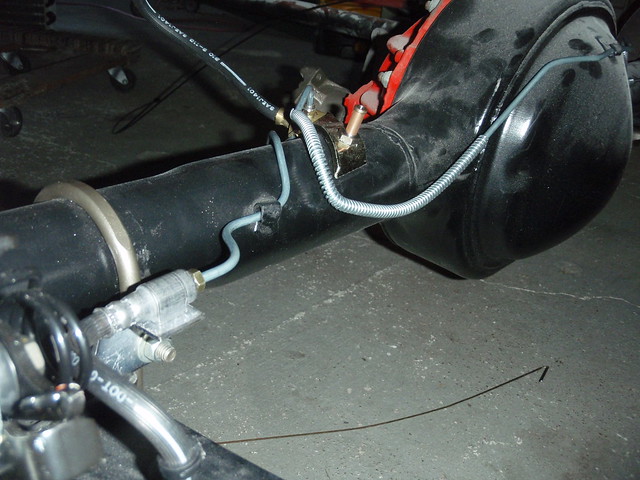
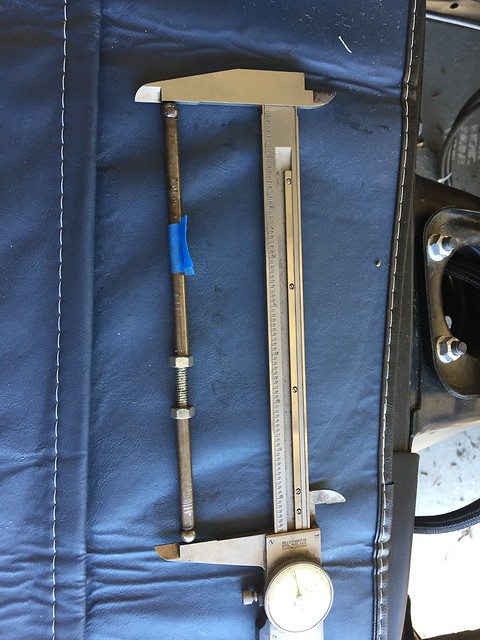
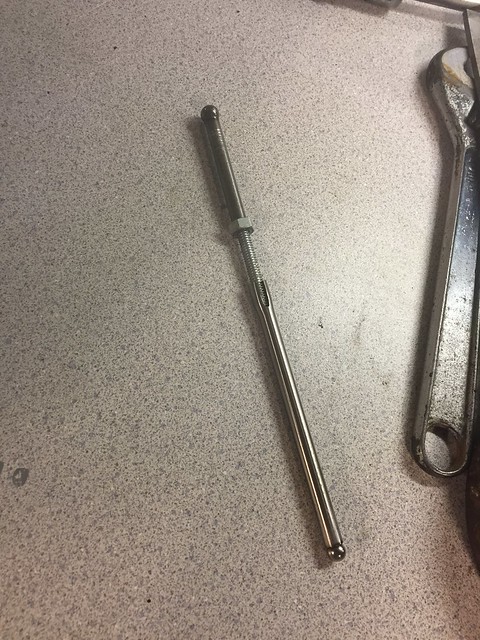
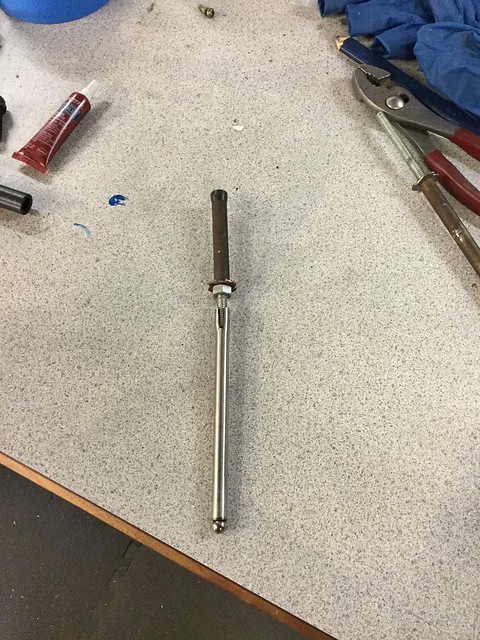
With the hard lines in place, it was time to mate them to the late model hose that need a bubble flare. From advice on the site, I bought the shortest hard line from O’reilly’s for the fittings and cut them off. The hex on those fittings are not the same size for a stick. Figured that out before the second flare!!  Several you tube videos later, a borrowed tool from a guy at work, and I was set. On my very first practice piece, I broke the die stuck in the end of the line. : (  I bought a flaring kit from Harbor Freight, took a little more time, and was able to get the four ends flared that I needed. Then gave the tool to the guy at work along with his partial set. Breaking someone else’s tools is the main reason I try not to borrow stuff.

Pic P7160024
 
  
Pic P7160027

 
Pic P7160031

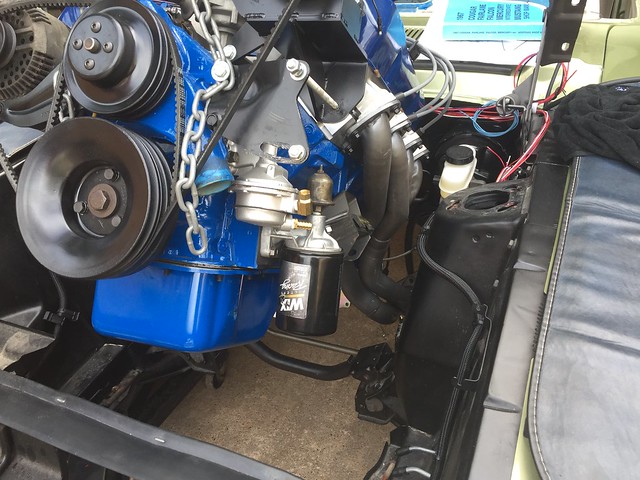
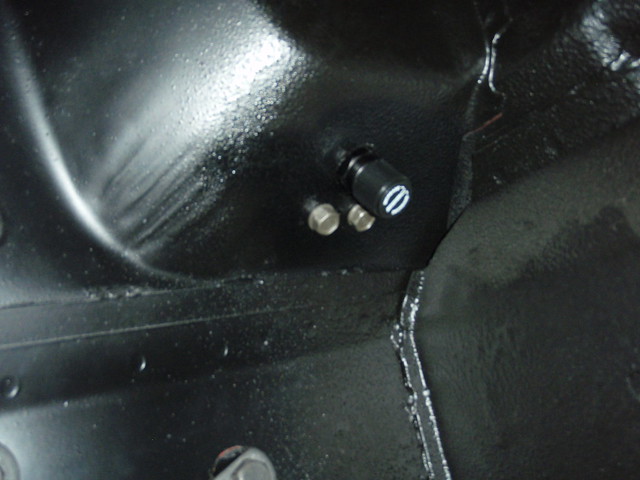
That got my lines complete from the calipers back to the pressure differential valve. I needed to install a proportioning valve to go with the rear disc. I was hesitant to mount between the apron and the booster down low with the knob up cause it would be extremely difficult to get to for adjustment. The Borgeson box went in so I would not interfere with the Proportioning valve. The booster was in place already. After asking if it had to be mounted in some certain orientation, I drilled a hole in the apron and mounted it with the knob down into the fender well. Should be a lot easier to adjust. Made several attempts at the double flare with the flaring bar I had with no luck. More you tube videos, and I was back to Harbor Freight for another flaring kit that I would keep. A couple of test runs later and they went together. Brake lines complete from distribution block to calipers. Now, will they leak when brake fluid enters the picture? I sure hope not.

 
Pic P7240017
 

Pic P7240019 

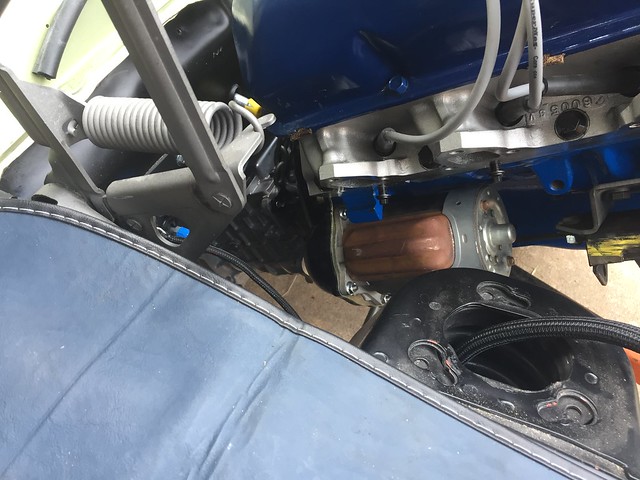
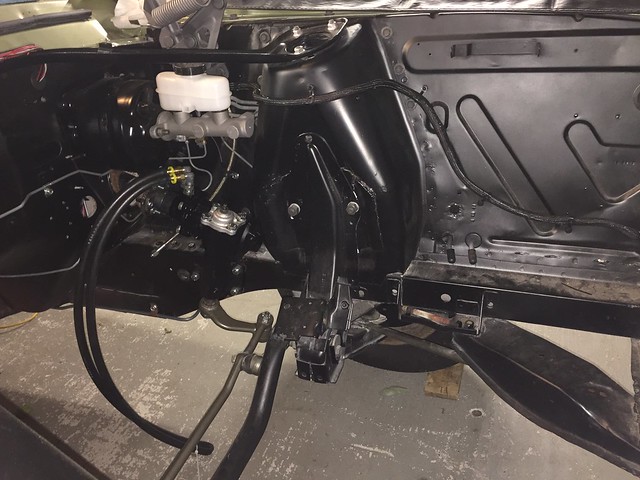
The firewall from the inside of the car was painted silver to reflect some light, and it helped to see. Added body sealer to the seams on the bottom side of the cowl for good measure. Then sprayed the rubberized under coating on the inside firewall, back too hard to see. Mounted the clutch and brake pedals in the car, then the power booster went on.
 

 Pic P7220022
 
Back in March, I had the parts in my truck at work to take in for balancing. It was show and tell for one of the other guys at the office. He was looking at the rods and said the pin is floating. I’m like “yea, FE’s are that way, you bowtie boys have to pay extra for that”. Then he showed me where the random rod he picked up had the bronze bushing sliding around on the pin. : (
  
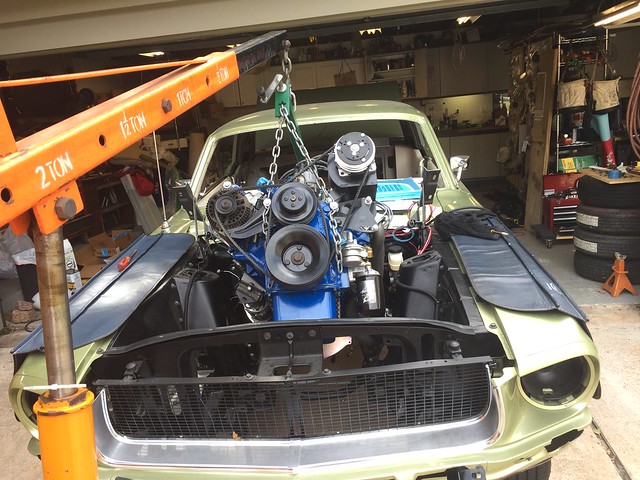
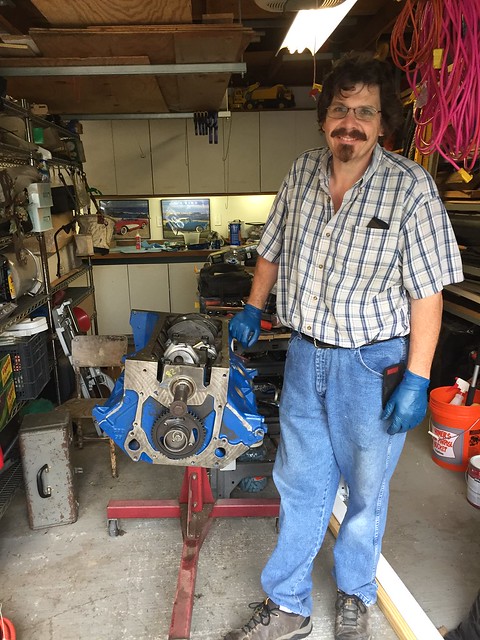
The engine will be a .060 over 410. I dug the crank out of a 410 in the early 90’s from a pick a part. Didn’t cost much at all and the afternoon to pull it out. I should have bought the complete engine, lessons learned.
 
The first trip over, I took the crank, rods, and cast truck pistons to Houston Engine and Balance for balancing. After discussions on pricing for new bushings in the little end and new bolts, and the cost of new rods, I opted for new Eagle rods. Next trip over was to carry the new rods, harmonic balancer, flywheel, and pressure plate. Trip after that was the block for a bath and decking. The crank was standard, got mag’d, and cleaned up at .010. The flywheel was drilled for an 11” clutch and the pressure plate was 11 ½”. Jeff drilled the flywheel to match. The block was cleaned, lifter galleries tapped, new cam bearings installed, square decked and cut for a zero deck height. All came back ready for assemble.
  
I ordered a set of Felony heads from Survival and those are now sitting in the garage now too. I will run a hydraulic roller cam, but haven't figured out what to buy.
 
 Next step in car assemble, right after a good garage cleaning and purge, will be the master cylinder to complete the brake lines and installing the hydraulic clutch.
Updated pics 9/27/2022
 

Last edited by Bolted to Floor (9/27/2022 12:06 PM)


John  -- 67 Mustang Coupe 390 5 speed
 

6/13/2017 9:51 PM  #27


Re: My Cars

Its been a while since my last update, but I am slowly working on the car.
 
The brake and clutch master cylinder have been mounted. A trip to pick a part provided the correct fittings for the master and some tubing to get around to the distribution block to complete the hard lines for the brakes.


Pic 2016-08-14 20.25.02
A second fuel line to be used as a return has been installed. It's a 5/16" that follows the factory route through the trans tunnel toward the front. 


Pic 3951

  
Pic 3947

Updated pictures 5/11/18
Updated pics again 9/29/2022

Last edited by Bolted to Floor (9/29/2022 11:06 AM)


John  -- 67 Mustang Coupe 390 5 speed
     Thread Starter
 

6/13/2017 9:53 PM  #28


Re: My Cars

The only thing that is slower and more useless than me at times is Tiny Pic and Photobucket. Took over an hour for the last post to get the pictures loaded.


John  -- 67 Mustang Coupe 390 5 speed
     Thread Starter
 

6/13/2017 9:56 PM  #29


Re: My Cars

Looking Great!


6/13/2017 9:59 PM  #30


Re: My Cars

Thanks Coupe,

After my wife got tired of watching me spend so much time looking for parts that I’ve bought over the years. She had this solution. I wish she would have thought about it sooner.

   
Pic 3958
 
The Borgeson box is mounted and the column has been cut down to fit. I still have to buy the MS bearing to keep it stable. I dropped in the short block with one head to check routing of the power steering lines. I will need to go underneath the car, cause there just isn't any room to bring them up top and have decent clearance around the headers. The slip on fittings in the pictures will be replaced with crimp style for installation. 

    
Pic 3945

Updated pictures 5/11/18
Updated pics again 9/29/2022
 

Last edited by Bolted to Floor (9/29/2022 11:18 AM)


John  -- 67 Mustang Coupe 390 5 speed
     Thread Starter
 

6/13/2017 10:12 PM  #31


Re: My Cars

The Painless harness is routed through the car. The front and back sections was pretty straight forward for placement. The under dash section was a little more intimidating. The right side door switch wiring was not long enough to route the way Ford did, so it went the direct route. Since I bought a Vintage Air system, I pulled the AC wiring from the Painless harness and will use the feed for the Vintage kit. I've terminated the backup lights, dome light, and right door stuff. I will have to make changes under the hood to go with the 3G alternator. The plan for down the road is to add a fuse block other accessories down the road. 

  
Pic 3990

Updated picture 5/11/18
Updated pics again 9/29/2022

Last edited by Bolted to Floor (9/29/2022 11:21 AM)


John  -- 67 Mustang Coupe 390 5 speed
     Thread Starter
 

6/13/2017 11:07 PM  #32


Re: My Cars

I finally got tires and wheels installed. After much gnashing of teeth on whether they would clear the brakes, I ordered 1 American Racing VN527 Mag with Grey Machine Lip with 4.5 inch of back spacing from Jegs to see if they would fit, then ordered the rest. They are 17 x 8 on all corners wrapped in Michelins Pilots. The fronts are 235/45/17 and 245/45/17 in the back. For now, the fronts tires get within a ½” of rubbing the frame on the back side of the control arm when the  wheels are turned hard to lock. I think that will change when the suspension gets loaded.

  
Pic 4850

     
Pic 4851

Updated pictures 5/11/18
Updated pics again 9/29/2022

Last edited by Bolted to Floor (9/29/2022 11:26 AM)


John  -- 67 Mustang Coupe 390 5 speed
     Thread Starter
 

6/14/2017 8:42 PM  #33


Re: My Cars

Great idea on the parts board and the wheels look great on the car!


6/19/2017 6:24 PM  #34


Re: My Cars

Hey Coupe, The board works great. I have found myself walking around thinking about stuff I need to get and find it hanging on the board.

The machine work on the motor was completed last year. I bought a roller cam and lifters through Brent this year and started to assemble. Had to clearance the block and bell for the headers. Got the crank in and torqued. It spun over by hand fairly easy, hurray for the little wonders. Getting the caps off the Eagle rods was a chore. That was a snug fit. Had to do a google search to figure out how the rods should attach to the crank with the bearing offset to one side. With that figured out, I could assemble the rods and pistons. Then stuff them into the block. 


Pic 3746


 Pic 3768
 
 
Cam went in next along with the timing chain and time to degree it!! Which is something I haven't tried to do in 25 years. Using a borrowed micrometer that fit down the lifter bore, I read a couple of articles, watched a couple of you tube videos, and gave it a whirl, then repeated all 3 steps 4, 5, or 8 times, I lost count. For some reason I thought that installing it 6 degree advanced would get me to the 106 centerline, boy was I wrong. 6-8 hours later, I had a decent understanding of how to degree the cam and mine is installed a 106 using the -4 degree slot on the crank gear. 
 

Pic 3808


Got the rocker arms set up on the new shafts, POPS end stands, shined to be over the valve, and rocker studs. Set the head on and used one of the old head bolts to hold it in place. There was not a lot of room to fit a socket over the head bolt, that can't be right, off to the googler. Turns out there is a nice set of installation instructions to go with Barry's heads. Found out I needed new head bolts or studs, what plugs are recommended, what gaskets are recommended, and several other useful items. That paper may have been in the box with the heads, but I saw something shiny and got distracted!! More parts ordered. 

Updated pictures 5/11/18
Updated pics again 9/30/2022

Last edited by Bolted to Floor (9/30/2022 7:21 AM)


John  -- 67 Mustang Coupe 390 5 speed
     Thread Starter
 

6/19/2017 6:31 PM  #35


Re: My Cars

Measuring for push rods were the next fun task. First time - Made a checker out of a ball on ball that I had just like others had suggested. Using info from Smith Brothers website, I took some measurements and asked for some feedback here. Brent Lykins promptly set me straight about the Morels taking a 5/16 ball. Second time - bought a pushrod from O'rielly's with 5/16 ball, adapted to checker, took measurements again, twice for each rod actually. There was a spread in the numbers from 8.678 TO 8.722. Some would have more than the required preload, others would have less, and I would need to buy different lengths for the intake and exhaust. Decided it was best to use the adjustable rockers and buy 1 length for all push rods. Third time - a racer buddy from work scrounged up a cup on ball pushrod to be altered for the checker. Reset rocker shafts within adjustable rockers. Measured them all again twice for repeatability. Took the dimensions back to Smith Brothers and ordered them. Man was I nervous to see how they were going to fit. Spent most all my adult life taking measurement to the nearest 1/8". This requires a little more precision. Low and behold, they seem to fit just fine. 
 
 
 Pic 3911
 

Pic 3934


Pic 1285
 
Time to check piston to valve clearance. Placed some plumbers putty on the piston top. Smear oil on the valves. Get everything set-up on #1 and spin the motor over. Pull the head, no marks on the putty. I have plenty of clearance!!! That feeling lasted till I had the heads torqued down, all the pushrods in place and rocker arms adjusted. Turning the motor over with a ratchet watching the valves go up down and saw the lifter collapse to let the valve spring back. Whoops. I wasn’t in full on panic mode, but I was greatly concerned and it was time to walk away for a bit.
 
After talking with the racer buddy at work that gave me an old pair of solid rollers and reading the link to Engine Labs he sent, I would tackle this again. Barry’s instruction for the heads also noted at what crank degree to check the clearance for the most likely contact points.
 
My new push rods were too short to use with the solid roller so, I took the scrounged up push rod and connected it back together. It took a while for me to grasp doing all of this with the head in place. At one point that Saturday, I was frustrated and ready to load it all in the truck and take it back to the machinist and pay him whatever to make sure it was right. On Sunday with a new view on things, more reading, and videos behind me, it was sinking in. My biggest AH HA moment was when it dawned on me that yes, you are checking one valve before TDC and the other after TDC. You’re doing this on the intake stroke and the exhaust stroke, not the same stroke……..you guys don’t laugh too hard, I’m slow sometimes. I still don’t know the exact amount of VTP clearance I have, but I drove each valve down .200” at 5 & 20 degrees before and after TDC for the corresponding valve. I figured that was good. By the time I was done, there wasn’t much of an interference fit for the adjuster screws on the number 1 cylinder. A set of Crane adjuster screws and jam nuts were ordered. Added a windage tray and did a little clearancing where the dip stick gets close.
With the pan installed and it sitting upright with 7 ½ quarts of oil, I used a long ¼” socket and extensions all taped together for priming. It didn’t take long for to make a puddle in the floor. What a great day.
 
   
Pic 4812
 
 
Pic 4739

 
Pic 4863

Updated pictures 5/11/18
Updated pics again 9/30/2022

Last edited by Bolted to Floor (9/30/2022 7:41 AM)


John  -- 67 Mustang Coupe 390 5 speed
     Thread Starter
 

6/19/2017 6:42 PM  #36


Re: My Cars

It’s ready to go visit Jeff, with Houston Engine and Balance for a little Dyno time. I’ve stopped by several times to ask questions about what I need to bring. Just trying to be prepared. I will use my $45 Craigslist find 750 Vacuum secondary. I bought some parts from Ebay to make it look like the 735’s. Dropped it off with PRC Precision for a rebuild at Jeff’s  recommendation. He wanted to know cubic inches and cam info. Steve suggested to add the rear metering block for 4 corner adjustment. Said it should be close and he is willing to stop by the dyno shop while its bolted up if need be. Now I wait on an open slot at the shop.
 
   
Pic 4877
 
 
This weekend I installed the evaporator case for the Vintage Air system, the ducting, and wiring installed for the most part.  I need to call Painless to verify the AC circuit they provided will carry the Vintage Air system and some questions over grounds. It fit up in there petty well and the dash is starting to get full.
 
 
Pic 1288
 
Spent part of Sunday afternoon figuring out which way to go next. The steering column needs to come back out for clean-up and paint. I need to add a power distribution block for other accessories and get the Painless harness configured with a 3G alternator and whatever I need to protect the wiring.  
 

Last edited by Bolted to Floor (9/30/2022 7:51 AM)


John  -- 67 Mustang Coupe 390 5 speed
     Thread Starter
 

6/19/2017 8:47 PM  #37


Re: My Cars

Looking very Nice!  That lime gold looks beautiful with those wheels!  Keep it up, don't stop, you're getting closer.


6/20/2017 5:13 PM  #38


Re: My Cars

Thanks Ozblitz, I'm trying to have it ready for the Bash.


John  -- 67 Mustang Coupe 390 5 speed
     Thread Starter
 

6/21/2017 7:07 PM  #39


Re: My Cars

Looking great John! I have a ways to go before I will have mine to a bash but working on it every chance I can.


7/03/2017 12:03 AM  #40


Re: My Cars

  Well, I poured brake fluid in the master cylinder and was rewarded with more puddles!! It just ain't the same feeling as priming the motor. It would have helped if I had checked to make sure all the fittings were tight too. There were a couple of double flares that needed to be redone also. With no leaks now, the back have been bleed and I have to replace a flex hose in the front. Should be here in e few more days.  

The fresh air vent on the driver side is installed along with the parking brake mechanism. I pulled the column back out to take it for painting.  

I got a call from Jeff, the engine came to life. Man, what a feeling. He opened the filter after break in and said all looked good. I don't know that I could ever get across how great it was to see it sitting on the stand and running. I could never have done this by myself, all the help is very much appreciated. I got a video of the final run and a print out that shows 503 Ft.lb @ 3800 and 452 HP @ 5200. 


It's back home in the garage and I started getting the accessories and bracket bolted on prior to stuffing it into the car. 


Updated pictures 5/11/18
Updated pics again 9/30/2022

Last edited by Bolted to Floor (9/30/2022 8:04 AM)


John  -- 67 Mustang Coupe 390 5 speed
     Thread Starter
 

7/05/2017 4:27 AM  #41


Re: My Cars

Slow progress but your getting there! Nice man keep it up


7/26/2017 8:57 AM  #42


Re: My Cars

Bolted to Floor wrote:

The only thing that is slower and more useless than me at times is Tiny Pic and Photobucket. Took over an hour for the last post to get the pictures loaded.

If you will use your photo editing software on your computer to resize the pictures so they are only 850 pixels wide, they will then load almost instantaneously.  And at 850 pixel width, they are still perfectly viewable on a computer screen.


Money you enjoy wasting is NOT wasted money... unless your wife finds out.
 

9/21/2017 8:34 AM  #43


Re: My Cars

Really looks nice.  A lot of excellent quality workmanship.


Mustang Steve Bash in Gruene, Texas September29-30, 2023
 

9/22/2017 9:25 PM  #44


Re: My Cars

Very respective numbers there!


9/22/2017 9:29 PM  #45


Re: My Cars

That is a 390 correct?


9/23/2017 5:56 AM  #46


Re: My Cars

Thanks for the kind words guys. I keep plugging away but progress is slow. Most times I go to work on something, I find that there is one part I didn't order.   

Coupe, its actually a .60 over 410 motor. Mercury used that displacement for 66 & 67. It shares the 4.05" bore of a 390 and the 3.98" stroke from the 428. It shared the same pistons as a 390 truck motor.  Yea, it sounds odd, but Ford did a bunch of piston swapping to change compression ratios.

Last edited by Bolted to Floor (9/23/2017 6:01 AM)


John  -- 67 Mustang Coupe 390 5 speed
     Thread Starter
 

10/10/2017 12:50 AM  #47


Re: My Cars

That looks great!


11/08/2017 10:27 PM  #48


Re: My Cars

Started getting the accessories mounted before the engine goes in the car. Figured I would have more room to work. Mounting a 3G alternator up high required me to shave off part of a bolt hole that was on the back. No big deal, done. Now I have just enough clearance. Scrounged up a V belt pulley for the swap. It needed a washer on the back side to not rub on the housing. The way the pulley is made, I could not get a full nut on the Alt shaft. So I took the pulley and washer to the machine shop and had him turn down the back outer edge of the pulley by the thickness of the washer and turn down the front shoulder by half the thickness. I would say it was no more than 1/8” on either side. Pulley doesn’t rub and there is a full nut for tightening.
 
The bracket for the Sanderson compressor that came with the Vintage Air kit is a work of art and fit great.
 
I scrounged a pick a part for a Ford with a Saginaw style PS pump and found one on a van that was partial disassembled. Twenty minutes later it’s unbolted from the van and a few more minutes with my favorite hammer to remove the cast aluminum bracket and I had a good core for mock up. The V-Belt pulley was harder to find than the pump. The right age Chevy’s were few and far between with pump gone except for the one with a double pulley. Finally hit pay dirt with a Chrysler!!
 
I used the steel PS bracket that Ford did with the adjusting slot to get the pump over where I wanted it. The typical cast aluminum PS pump bracket that Ford used would not line up well with the Saginaw pump mounting holes and the pulley was way off. Turns out I could use a piece of flat plate in front of the steel bracket and the pulley lined up very well. Measuring the mounting holes on the front of the Saginaw pump was a pain and I missed one by a small amount, enlarging the hole helped. Did anyone know those four bolts are on two different planes?? It’s about 3/8” difference in elevation. With the accessories bolted on where I “think” I want them, it’s about time install.


John  -- 67 Mustang Coupe 390 5 speed
     Thread Starter
 

11/08/2017 10:29 PM  #49


Re: My Cars

Got the flywheel bolted on with the Quicktime and checked the runout, and it was within tolerance. I unboxed the transmission that’s been collecting dust for the last 3 years and went to looking it over and got the hydraulic throw out bearing set up.


It’s funny what you do sometimes to when you don’t have the proper tools. This was the closet thong I could find to the proper line up tool. Wrong spline count and wrong diameter for the pilot bushing. Layers of blue tape got the diameter close enough and twisting the clutch disk down over the splines milled them the proper size.


John  -- 67 Mustang Coupe 390 5 speed
     Thread Starter
 

11/08/2017 10:34 PM  #50


Re: My Cars

The Brother in law brought an extra pair of hands to stuff this thing in the car. With the clutch assemble installed and the motor hanging from a chain, the transmission slide right into place on the first try. First thought was we left something out and need to pull it apart, but we didn’t. Played with the output shaft with the trans in and out of gear and was happy with the results. 
 
We installed the motor tranny combo with a header bolted to the driver side. Note to self for next time is have the handle for the leveler to the back so it won’t hit the hoist!! Used the floor jack under the car to get the trans in place on the mount. Set the bolt in the driver side and repositioned the hoist to lift the passenger side up of the install the header from the bottom. Used the Felpro 1442 header gaskets and ARP bolts with the 5/16” hex head and anti-seize.


John  -- 67 Mustang Coupe 390 5 speed
     Thread Starter
 

Board footera


REMEMBER!!! When posting a question about your Mustang or other Ford on this forum, BE SURE to tell us what it is, what year, engine, etc so we have enough information to go on.