Posted by Bolted to Floor  8/31/2018 11:30 PM | #76 |
The passenger side coil spring and shock went in Sunday evening without much issue once I got it clocked right on coil spring compressor. And man that’s an eerie feeling with that much stored energy.
The driver side went in on Monday evening, but it didn’t go willingly!!
Tuesday morning was an appointment with B and B Tire for a front end alignment. The drive over was sketchy, but I got there without issue. There was a night and day difference with the test drive afterwards. Here’s the car on the rack. 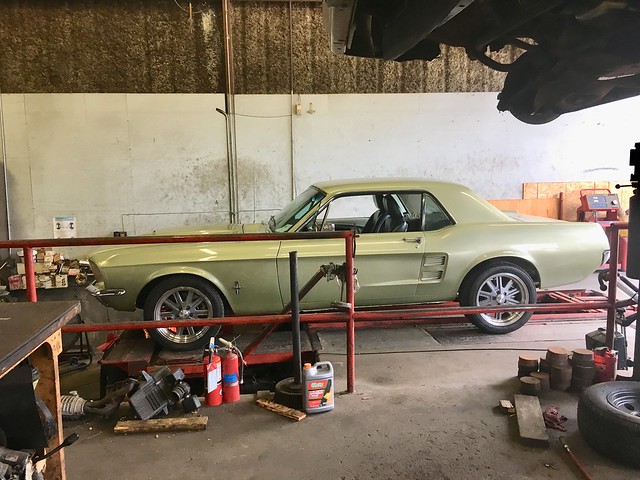
Pic 7685
Left the shop and less than a mile later, I was in a parking lot out of gas!!! Guess the gas gauge was more accurate than I thought. Glad I’m a AAA gold member, 8 tows a year up to 100 miles for me and the better half. It's money well spent!!
While I'm trying to figure out that I'm out of gas, yea, should be obvious, right? There was an extreme amount of vacuum on the tank, to the point it looks to have collapsed the tank some. It’s no longer flat across the bottom. Once home, I drained the gas tank, about 2 gallons, and tweaked the sending unit. Got enough gas in it to make it back to the station for more fuel. It’s a 20 gallon and tank and spitting back like its full at about 15 gallons.
Tuesday evening was a new set of spark plugs in preparation of carb work on Wednesday. Currently, it cranks cold and goes to an idle without a choke. Then the fumes will burn your eyes once its warmed up.
Wednesday, A buddy from work came over to help with the carb. We drove it around to get it warm, then made the turn onto the feeder of the toll road and hit it from a roll in first gear, all of second, and into third. Evan’s comment was "it should have been better". Told him I had to look at the linkage, I don't think it's opening all the way.
Back at the house, I worked on the linkage, it was getting about 1/2 half way open. Details, details. Evan played with the carb. He dropped the jets sizes on the primary & secondary plates and played with the idle screws. Now it’s more cold natured when it first cranks but doesn’t burn your eyes when it gets warm. Took the same route back to the feeder. Did the same run through the gears and was amazed how fast I exceeded the speed limit!! Evan was more impressed.
Took Sheryl out later that evening for drive to show the progress. She was excited, scared, laughing, and telling me to slow the hell down. Thankfully, she was too busy hanging on to hit me. We did manage to drive it about 25 miles. The speedometer is within 2 MPH of the speed in my Waze app.
Thursday evening was spent on the A/C controls. Programming the controls was not difficult, but it took me 45 minutes of trouble shooting to figure out I never hooked up the keyed hot!! Can’t tell ya why I didn’t finish it, but I bet I had a good reason at the time. Also found a tab on the starter switch that’s hot when the key is off and in accessory while I’m trying to re-install it in the form a sparking sound. Got the battery disconnected and the switch back out, figured out the tab in the picture was hot, and slipped a insulated flat blade connector over it. Now its all back together.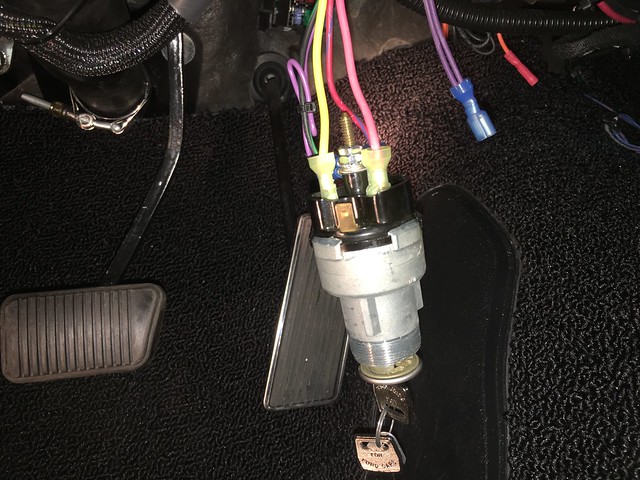 Pic 7719
Friday night, we drove it to dinner with a friend that retired last year. It was a little un-nerving to leave it in the parking lot by itself. I did take the coil wire with me though. Bruce that did the body and paint work told me to never worry about someone stealing it, his words were “its green and it’s a coupe, no one wants it”. We drove it around some more. Stopped for gas and later for custard.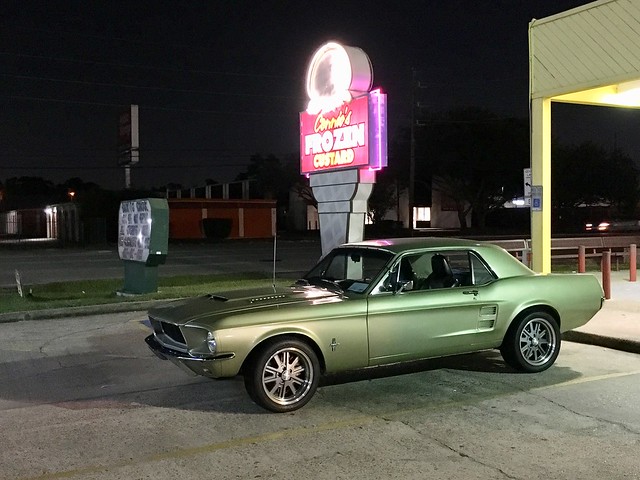 Pic E7723
Saturday was charging the air conditioner and watching the temperature. Its blowing cold air with my 4 foot shop fan blowing at the radiator. I don’t have a gauge that shows the actual degrees, so I use a infrared gun on the intake side of the thermostat. Its running in the 190 to 195 range with a 195 degree thermostat and one hole drilled in it. Don’t remember what size the hole is now. Moved the fan out of the way and stuck a thermometer in the radiator, it went to 205 / 210 idling in the driveway. Ambient temp was 95, the car was in the shade, no air movement except for the fan blade. Going down the road, the temp gauge rides where it has without the air conditioner.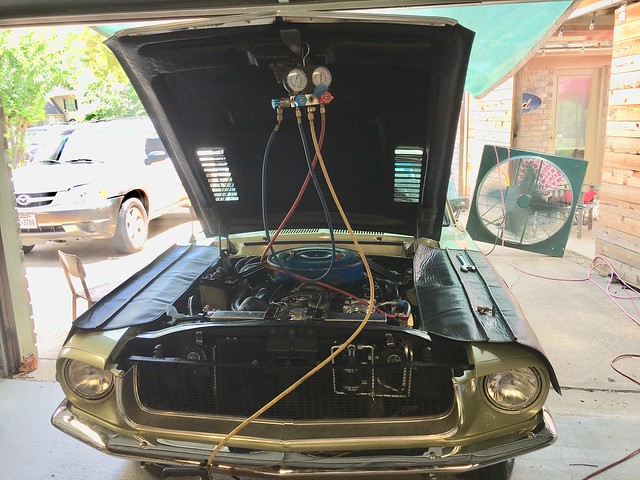 Pic E7724
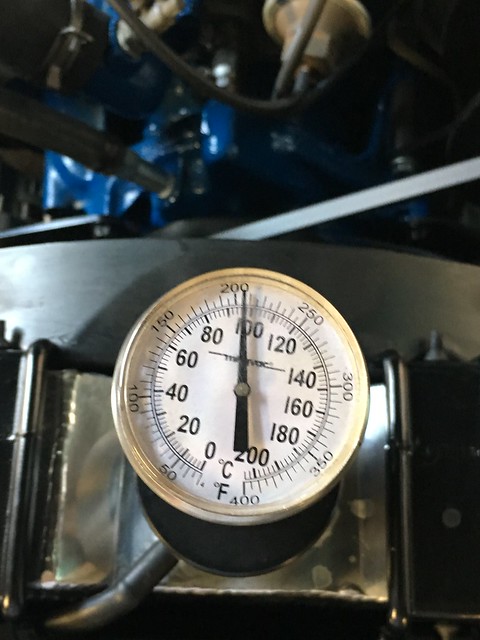
Pic 7725
The first test drive with the windows up and this song comes on the radio. 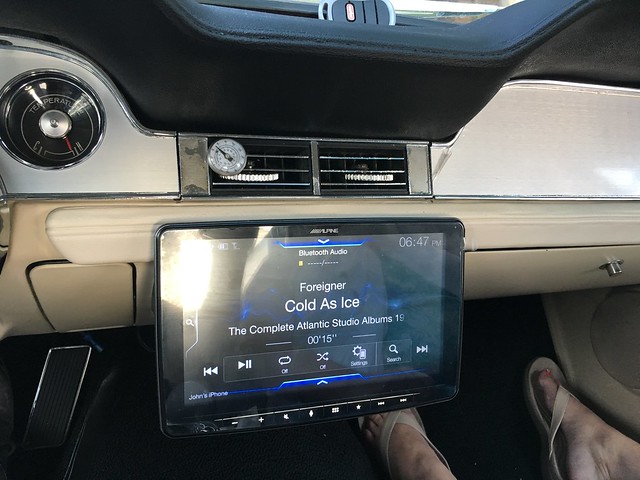 Pic 7727
Sunday was spent washing and cleaning. We drove it to dinner, had to stop for gas again, it’s beginning to become a reoccurring theme. And I left the coil wire on it this time, but we were sitting outside and I could watch it. Later, I took it to the local car gathering at the nearby Freddie’s Frozen custard. It was a small turnout with about 8 cars, mostly Mustangs. That's John Worley's car next to mine with Steve Buzeks and Coupe Daddy's next to his. That's Coupe Daddy with his buddy Shorty in the picture. 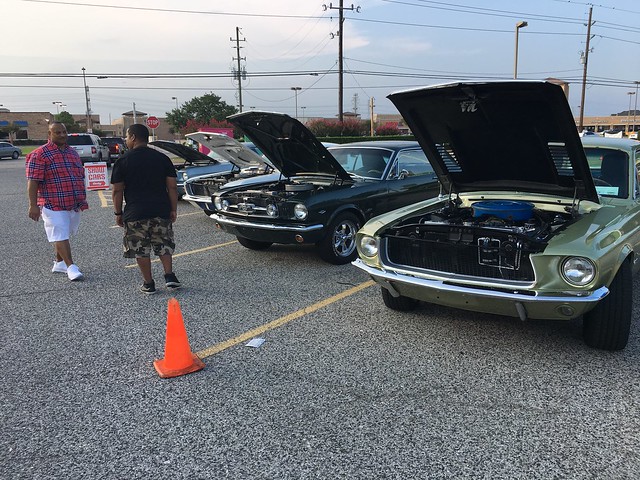 Pic 7731
I’ve drove it about 175 miles so far. The new list of things that need attention:
Check charge on AC, the air isn’t as cold as it should be when going down the road. It also seems like it satisfies the thermostat too soon and cuts out.
There are rattles in the door, other area seem OK
The Flow masters have to go. No telling what the noise from them is hiding.
Install trunk latch so I don’t have to use a screw driver
Need a better air cleaner
Valve covers are leaking oil.
Tires rub on big bumps
Gas Tank
Was out of town for work for part of the week and didn’t get a chance to do anything with the car till today. Managed to get the steering wheel aligned so its straight when the car is going straight. Took a rubber mallet to the front fenders to roll the lips in for tire clearance. The left rear fender lip was massaged too. Took a test drive the fender roll and empty the tank more so there’s less gas to drain. A couple of bumps later and it looks like I have clearance for now. Decided to extend the drive to the hardware store for small machine bolts to mount the back-up camera. Fired the car up to leave and the clutch goes to the floor!! I now have a puddle of fluid under the car. Time for another wrecker ride to the house.
Last edited by Bolted to Floor (10/10/2022 7:44 PM)
John -- 67 Mustang Coupe 390 5 speed
Posted by Bolted to Floor  10/05/2018 8:29 AM | #77 |
Short version of the clutch pedal is possible vibration issues that started around 50 MPH caused the hydraulic throw out bearing adjusting collar to back off. Front tires were out of balance, the driveshaft was good, and the transmission was rubbing on the cross member. After laying under the car and moving the weights around on the Centerforce, I decided to replace it with a McCleod. I don’t know that it added to the problem, but it was worth the hassle of not pulling it again. I am now good up to 80 MPH, so good enough for now. See the links for more details. I am still working at drive line angles. More on that later.
http://fyi.boardhost.com/viewtopic.php?id=8980
http://fepower.net/simplemachinesforum/index.php?topic=6408.0
Sorry for the lack of pictures, I was in a time crunch and didn’t take the time to capture the moment!!
I got the factory window trim moldings straightened and polished. I think I scared the
guy I scheduled to get the glass sealed and trim installed when I told him how much I spent. He went to looking for reasons to not do it. Told me that the clips that all the suppliers sell are not right. Should have been green, not black. After he left, I decided to do it myself.
After researching and watching videos, I gave it a whirl. How bad can it be, right? With help from Sheryl and the brother in law, we got both front and back out and back in with sealer without screwing them up. I used sealer that not supposed to dry hard. That sealer is like the white pipe dope that Plummer’s and Sprinkler fitter’s use......just open it and it can get everywhere!! Since it was up on jack stands with the transmission laying under it, I passed on one of the video tip of using a water hose to check for leaks prior to installing the trim. I didn’t want the garage floor covered with that much water. In hindsight, I should have.
One of the tips for the molding clips was to use a pair of pliers to tweak them just a bit to remove some of the tension prior to installing. “Makes the trim easier to go on” they said!! Since my clips were already on, I used a forked trim tool to open them up just a bit. Turned out to be too much on the front glass......there wasn’t enough tension left in the clips to keep the trim in place. Had to change most of the front clips out after spreading the sealer all around the glass. Talk about a mess!!
The trim went on again without too much fuss. It looks pretty good too.
The brother in-law helped me get the clutch and transmission back in the car along with the new Borla mufflers on the Saturday before the trip. Did some grinding on the transmission cross member cause it was rubbing the transmission case.
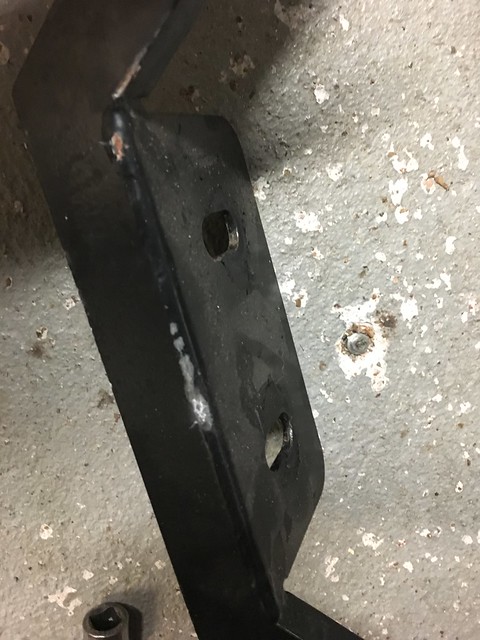
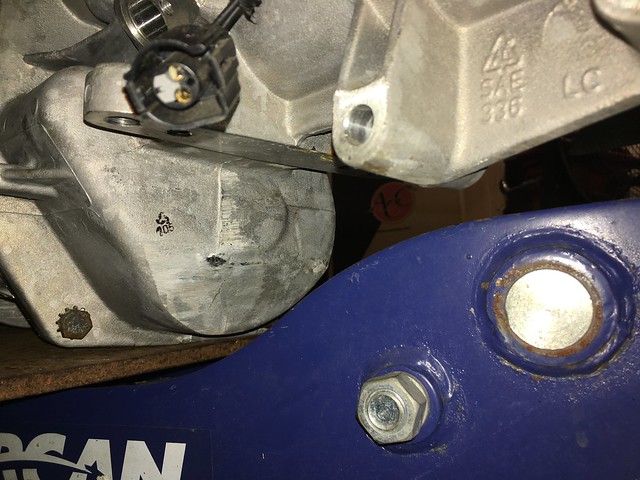
Pic 7810
Pic 7813
Was still in the process of bleeding the clutch when he had to leave that night. It was really being a pain and I didn’t get it done till Sunday.
Next up was the gas tank. It was a little collapsed from the gas cap not venting. Drained the gas, pinched off the gas line with vise grips, left the cap closed, regulated the air pressure down to 15 PSI and inflated the tank through the drain plug. It was pretty cool to see it expand back. I should have took a video.
A couple of pages and years back, I took a mallet and chunk of wood to level out the filler next in the tank. Turns out, this is a bad idea. I was more worried about getting the tank matched to the filler neck. The result is that level area is now the lowest point on the top side of the tank. Air gets trapped and the tank won’t get a full as it should!! I used some 2 x 4’s and a piece of all thread rod to raise it back up.
Drove it to work on Monday, September 10th and it wasn’t as bad as I thought it would be for dealing with the other drivers in Houston rush hour traffic. Vibration now starting at 60. Yay progress. It also rained that day and I found water in the floors. ☹️ So much for getting the glass sealed.
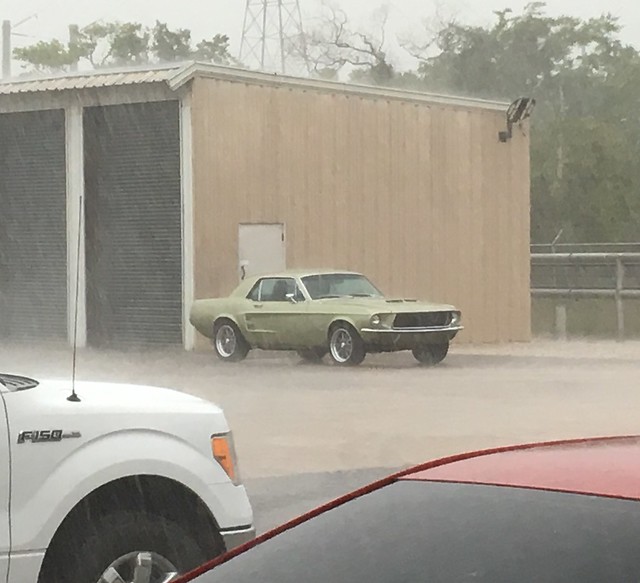
Pic E7843
The weather was too bad to drive on Tuesday so it stayed in the garage. After work, I took a look at the throw out bearing and it looked like it hadn’t moved. I pulled the cross member for more grinding and went for another drive. Picked up a little more speed, and I got a chance to drive it in the rain. 😱 It went pretty good till the wipers stopped mid stroke about the 1 o’clock position. Turned them off and then they moved to the 2 o’clock position and stopped....then went ahead and parked. Had Sheryl pick up a new wiper motor on Wednesday to take on the trip. I bought some Rain X too.
I took off Wednesday to continue getting it ready for the bash trip. Kept pulling the cross member, grinding on it for clearance, and taking a test drive. Got it to the point I could run 80 before vibration started and called it good enough for now. Was up late getting the Wesco 3 point seat belts installed, door and side panels, door handles, and the front window cranks. 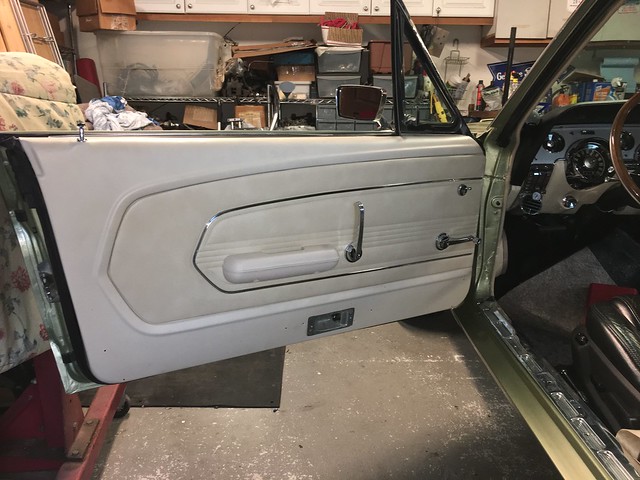
Pic 7947
Thursday morning was spent getting a box of tools together. With 378 shake down miles and a full tank of gas, we headed out to meet with the caravan, Steve, Glen, Daze, John, Charles, and Felicia to make our way to Glen Rose. It’s a great feeling to be cruising down the road with all these folks. The temperature looks good after comparing with an infrared gun in the driveway, 70 MPH at 2000 RPM, and the left rear is back to rubbing with the trunk loaded on bumps! With the drop down on the seat belts, they ride over the shoulder nicely and are very comfortable.
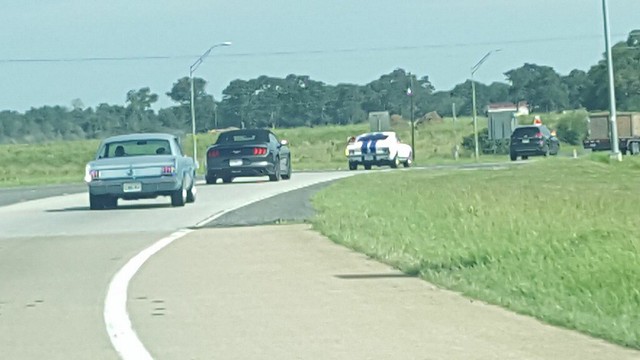
Pic 8033
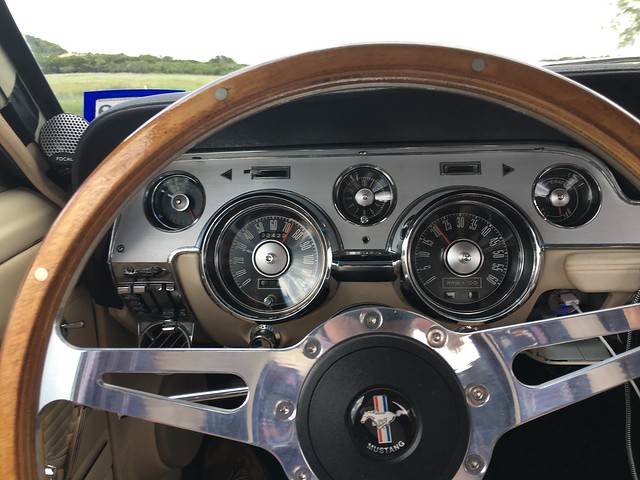
Pic 7883
Had my hands at the bottom of the wheel while Sheryl took the picture.
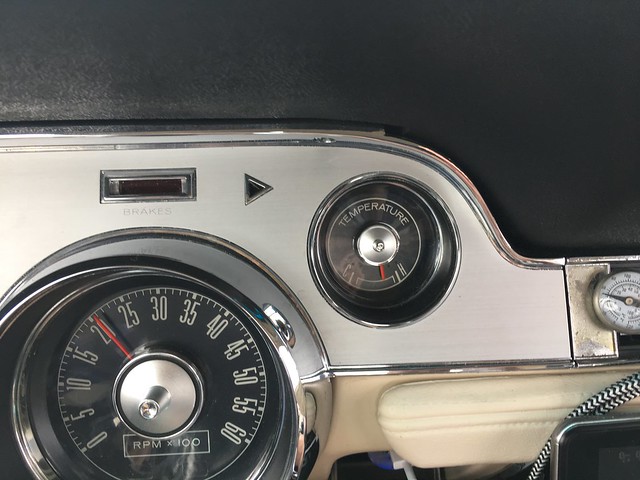
Pic 7885
Had lunch in Waco then filled up with gas just outside of town. I figured the tank at just over 17 MPG. Which was pretty amazing to me.
On Friday morning, Sheryl and I went to Dinosaur Valley State Park to look at the tracks. Me and the car are sitting in the road while Sheryl is taking the picture. The park ranger pulls up beside the car and I’m thinking he’s about to tell me to clear the road way, instead he kills that rattling diesel he’s driving and asks “is that a 67?” Turns out he’s a Mustang nut. He got a guided tour of the car and we stood in the road blocking both lanes for about 10 minutes till more traffic appeared.
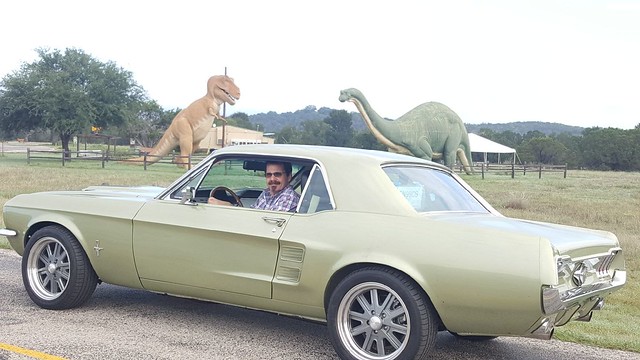
pic 8025
When we were leaving the burger joint after lunch, there were several that did an exhibition of speed 😱😱and I followed suit. I think I was somewhere near 5K on the tach in second gear when the green water hit the windshield......dam, I know what causes that!! Coasted down from speed as far as I could then ran about 30 into town and stopped at the nearest convenient store before the engine over heated. Raised the hood and yep, another heater hose popped off cause the spring clamps don’t hold well enough on this thing. Done that twice with a remanufactured water pump from the parts house!! Barry, aka 50vert was riding with me and give me a hand getting the hose back on and topping off the radiator.
Saturday was the Bash with a great turnout of cars. It was great to see the folks we’ve met at the two previous we’ve attended and everyone we met this time.
On the way home Sunday, the caravan got separated by an Audi that was running about 5 MPH slower than we were when the road narrowed to one lane. When I got a chance to pass, I grabbed fourth and went around as best I could without blowing off another heater hose. The two Mustangs behind me just about ran me over getting back in our lane. The dyno sheet said 450 HP and that should be enough for now, but the two cars behind me both had more. We had lunch in Waco, then ran together till the Waller area when we parted ways.
We drove it to dinner on Sunday evening and I noticed that the rear tire seems to rub more now with the trunk empty than it did before the Glen Rose trip. I was thinking the springs were settling in more. Ordered a set of longer shackles on Monday. On Tuesday, I hit a bad bump and drive the tire into the fender lip hard. It gouged part of the rubber out and pulled the fender lip. When I pulled the tire to work the lip back in, I found my spring is more than settling. 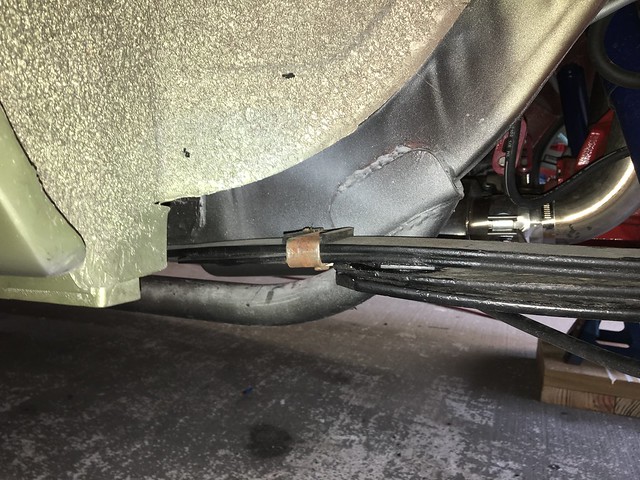
Pic 7960
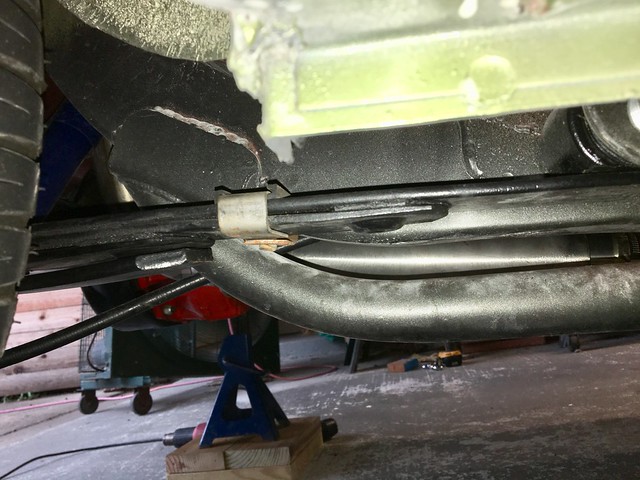
Pic 8024
They both kinda match.....in a bad way.
New 4 1/2 leaf Grab a trak standard eye springs have been ordered. Should get here next week. Taking a tip from Mustang Steve, I have ordered 1/2” lowered blocks and a 2 degree block for adjusting the pinion angle, if needed, that will be altered to center the rear end under the car with the new springs.
The upholstery from TMI finally arrived. The 6 week estimated delivery was actually 12. Got new seat foam too. I will drop all the seat stuff off with the Upholstery guy to get them covered.
Last edited by Bolted to Floor (10/10/2022 7:53 PM)
John -- 67 Mustang Coupe 390 5 speed
Posted by Bolted to Floor  3/12/2019 8:15 PM | #78 |
Update from August 31 post on the TO DO list
Check charge on AC, the air isn’t as cold as it should be when going down the road. It also seems like it satisfies the thermostat too soon and cuts out. Charge is good. work in progress
There are rattles in the door, other area seem OK. Took care of prior to Bash with some of the wire loom cover over the actuator arms
The Flow masters have to go. No telling what the noise from them is hiding. Borla's installed before the Bash, I can't say that they will stay for Michigan
Install trunk latch so I don’t have to use a screw driver. Installed during the Bash
Need a better air cleaner Picked one up from Steve's Mustang in Hockley before the Bash
Valve covers are leaking oil. Both chrome valve covers installed prior to Lucky's Rod Run and no more oil leaks.
Tires rub on big bumps Still an issue at the end of February
Gas Tank Popped out before the Bash
Last edited by Bolted to Floor (3/12/2019 8:17 PM)
John -- 67 Mustang Coupe 390 5 speed
Posted by Bolted to Floor  3/12/2019 8:46 PM | #79 |
Replaced all of the spring clamps on the heater hoses with worm drive clamps after the Bash. No more hoses popping apart.
The Grab A Tracks got installed and I was surprised it picked up about 5/8 of ride height. Took a picture for a side by side comparison, there is a slight gap toward the front eye on the old spring. You couldn't see that isolator when I put the spring packs back together after blasting and painting.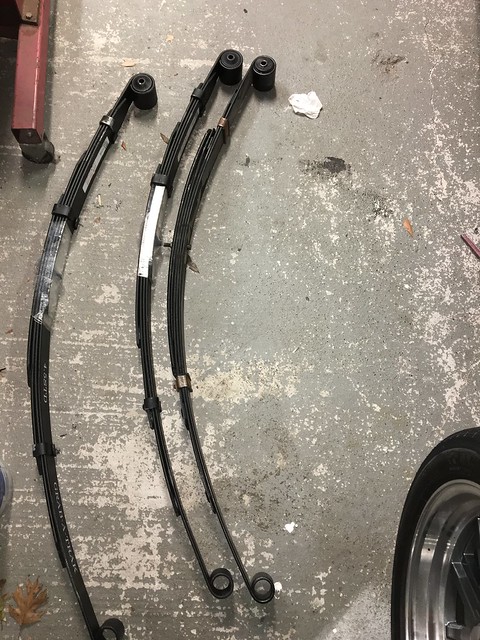
Pic 8234
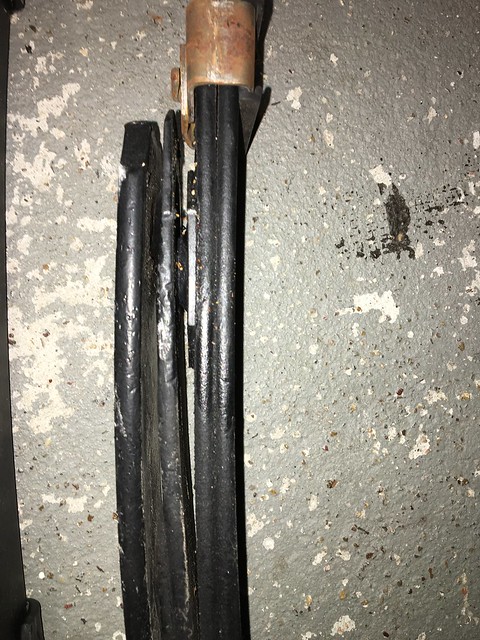
Pic 8236
If I ever go this far with a car again, I will start with new springs and leave the old stuff for the scrap pile.
Westside Upholstery installed all the seat covers and cleaned up the rear seat frame. The fronts look really great and are very comfortable. What I wasn't counting on is the new seat foam adding about an inch to the height of the seat. With the driver seat being powered, the inch is not much of an issue. The passenger seat is more of an issue since its manual and sits up higher than the driver. The back seat looks really good. Not sure how comfortable it will be, not much room for me back there.
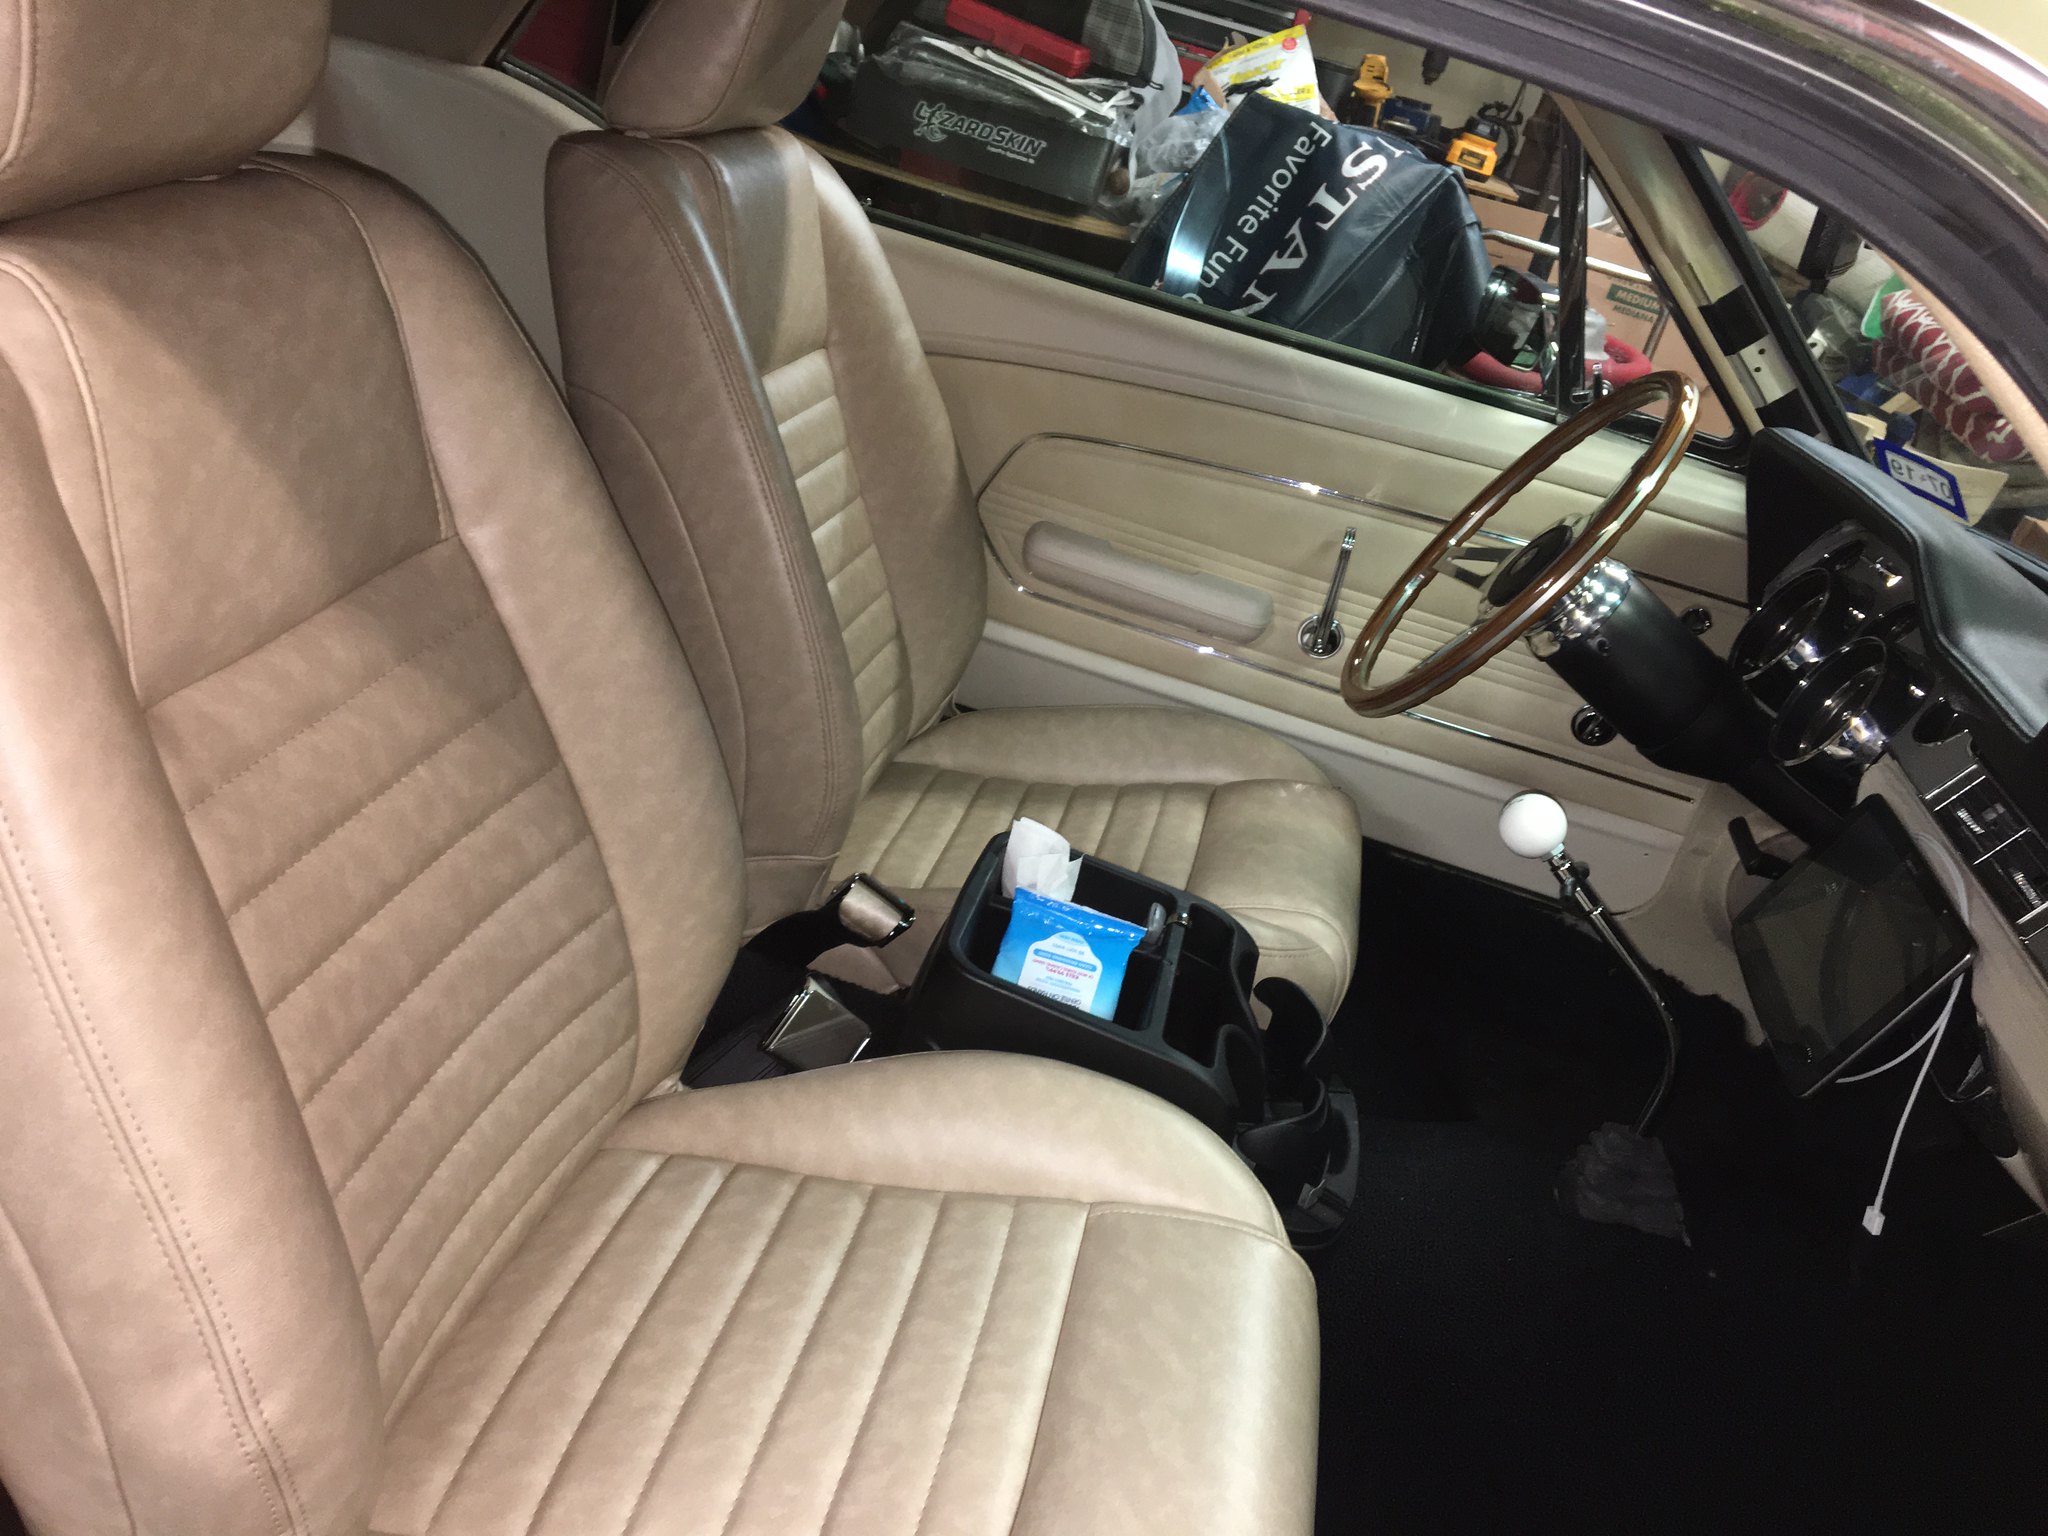 Pic 8239
Last edited by Bolted to Floor (10/10/2022 8:00 PM)
John -- 67 Mustang Coupe 390 5 speed
Posted by Mochaman  3/14/2019 10:54 AM | #80 |
For the tires rubbing on the big bumps. I used the Eastwood fender roller to press the lip down. You have to heat the paint up slightly so it doesn't crack. It cleared up about 95% of the tire rubbing. Loading car up with Bash level luggage and tools in the trunk made the problem appear again. Spoke with a local Mustang owner at a show and he showed me the coil over springs he put in his coup to stop that. Little bit stiffer in the back but hardly noticeable. Have had zero tires rubbing since. Mustang Steve warned against this because stiffer springs could cause issues with the metal. I have all new metal in my Fastback so any problem will show well after I am dead and gone.
Posted by Bolted to Floor  3/16/2019 11:09 AM | #81 |
Thanks for the tip Ed, if I can get back your way, I may hit you up to borrow that fender roller. I still have a phobia to doing anything that could effect the paint. It took so many years to get it on the car and the money it took to do it!!
I think there is some truth to what MS is saying. My car had non functioning air shocks from a previous owner when I got it. The shock openings up top had stress cracks running toward the front of the car that I had to weld up.
I have a few more updates on the car before I get to what I’m doing on the rear end.
John -- 67 Mustang Coupe 390 5 speed
Posted by Bolted to Floor  3/22/2019 11:12 PM | #82 |
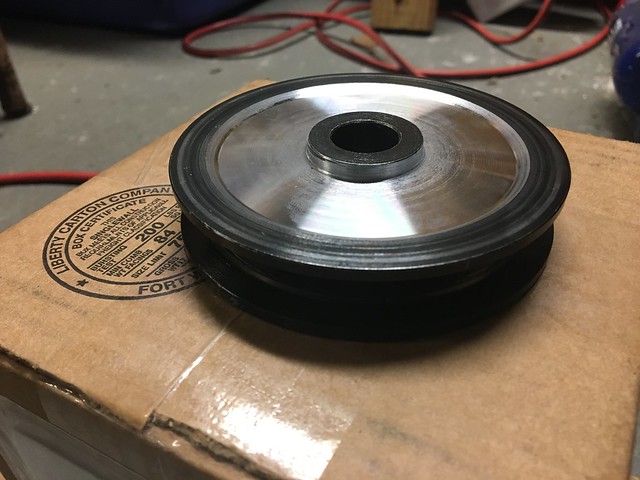
I got tired of hearing the alternator belt squeal at start up. I couldn’t keep it tight enough for very long and took MS advice to ordered the HiPo pulley for the 3G. It went on before Lucky’s Rod Run, but it wasn’t necessarily a “bolt on” upgrade. The pulley hit the housing before it bottomed out on the shaft. Quick measuring said I needed about .030 to make up the difference. So, I cut washers out of an old license plate and flashing from my gutters. The downside was I had less than a full nut to to secure it. Belt squeal at start up is now gone. Recently, I took the alternator & pulley to the Houston Engine and Balance to have it machined to fit. Jeff took enough off the back side to fit without washers and enough off the front for a full nut. The pulleys line up very well too. 
Pic 8666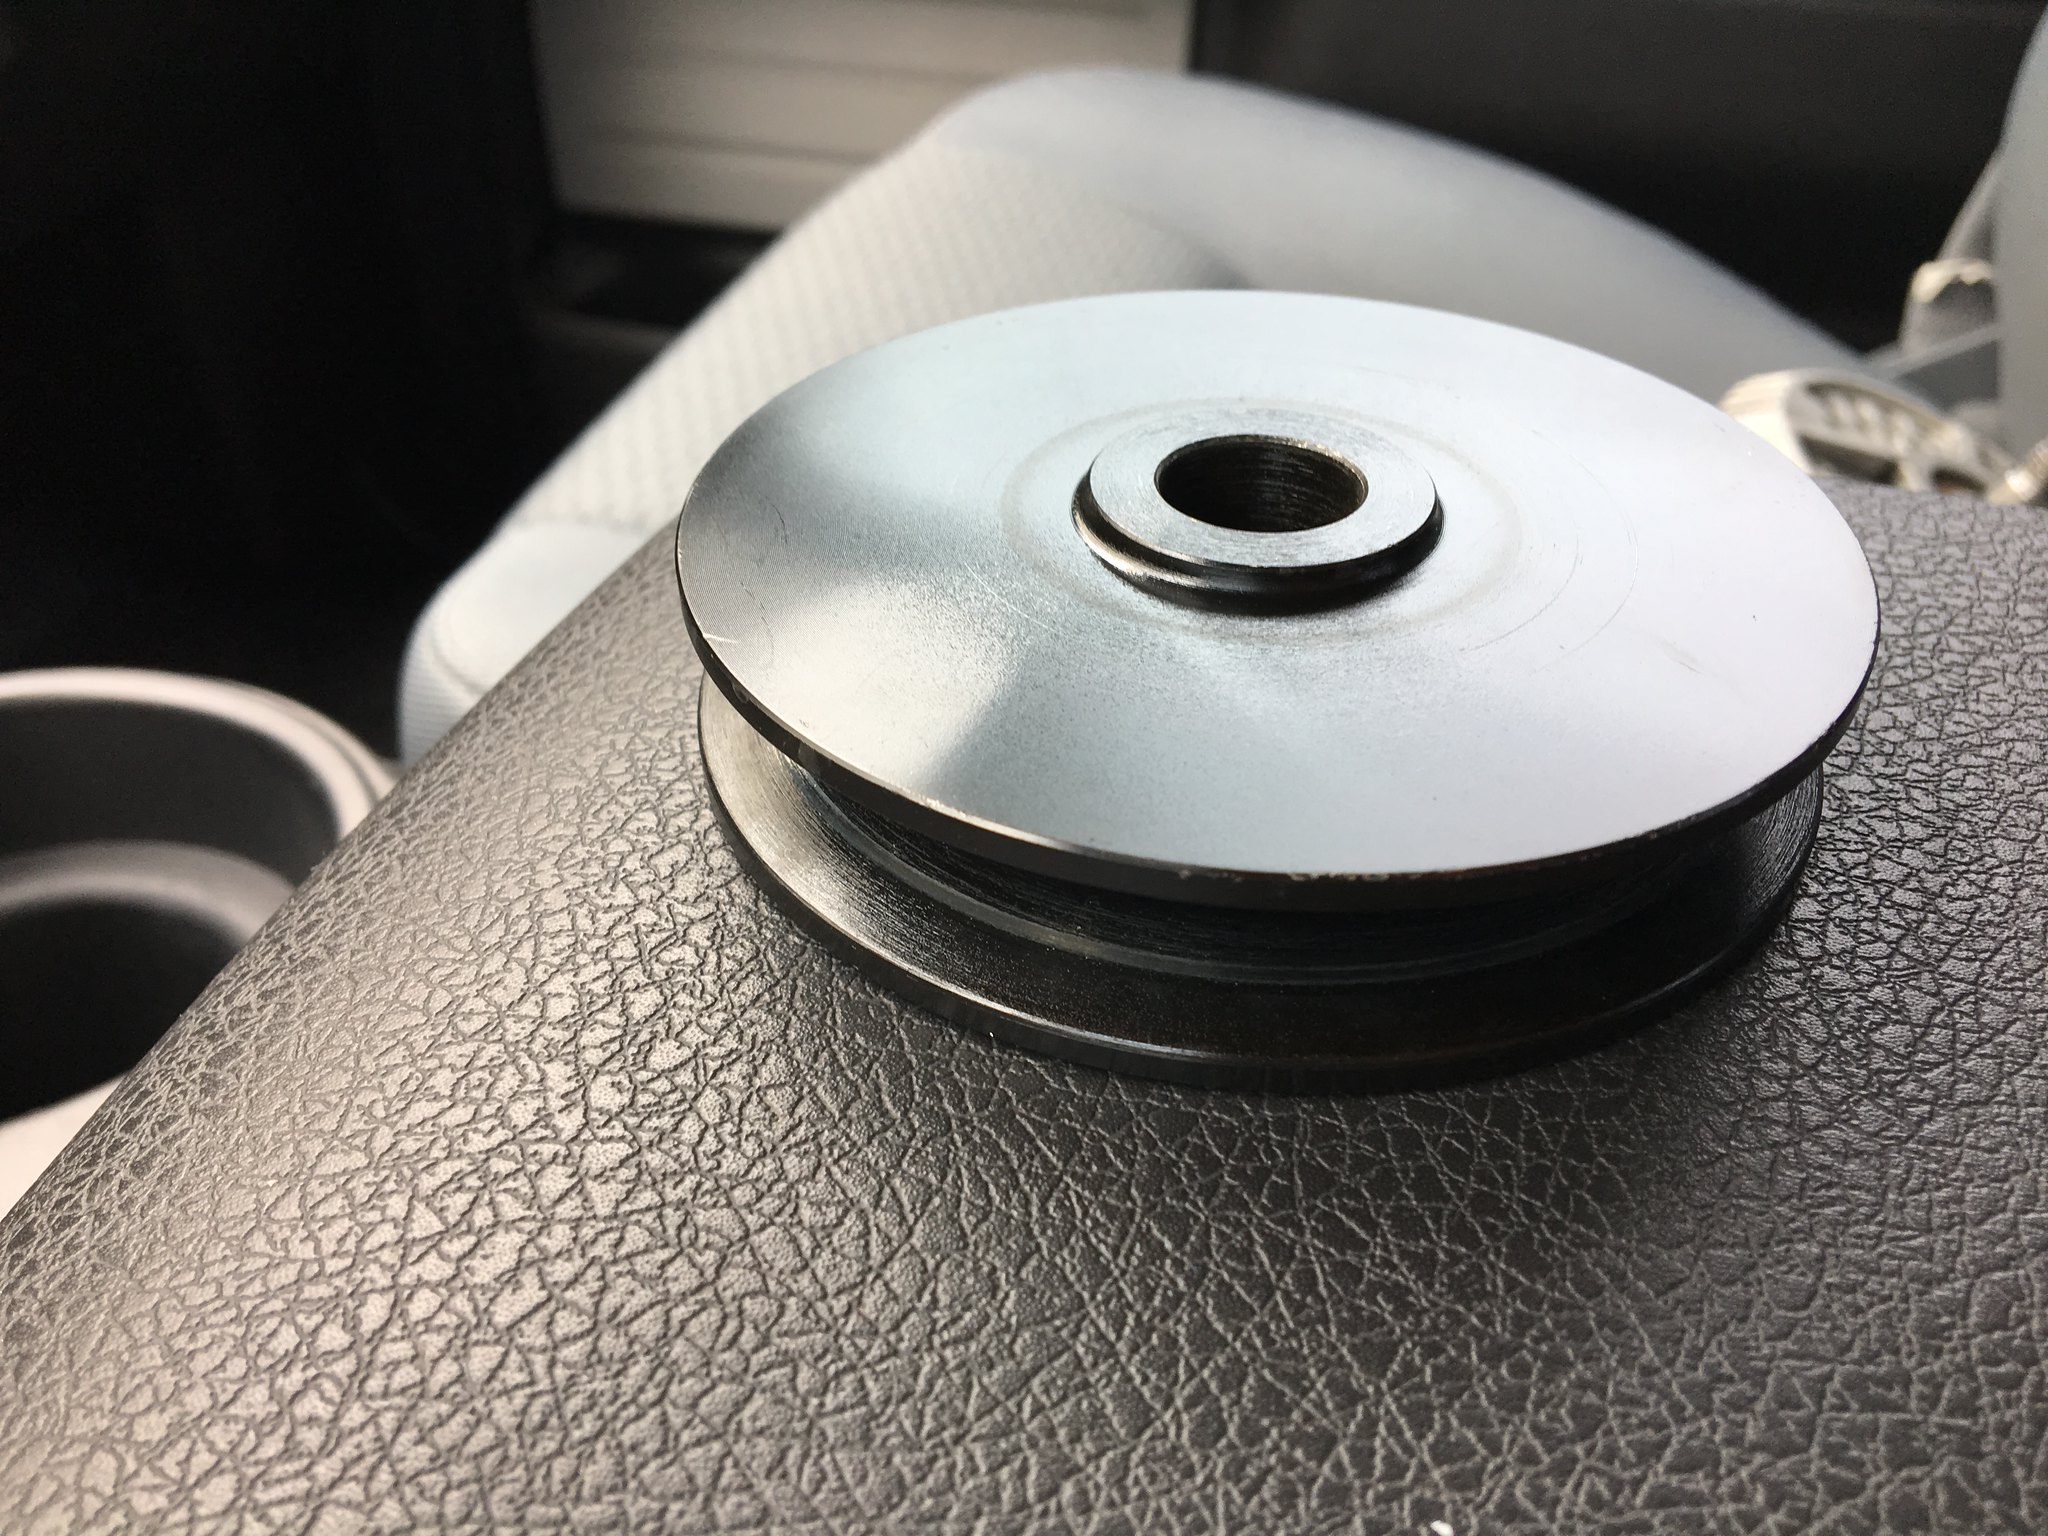
Pic 8888
Pic 8887
Pic 8909

Pic 8910
Pic 9017
While it was on jack stands, I pulled the transmission cross member and found more witness marks where it was rubbing the transmission. A little more grinding and a shot of black paint, time for a test drive!! After a couple of stints around 90 on the freeway, it looks like all my vibrations are gone. But there is still a noise, it changes too. It has similarities to the sound of the bad axle shaft we had in our DD van years ago, but it’s not a constant roar. I guess you could say it changes volume at a steady speed.
Last edited by Bolted to Floor (10/10/2022 8:51 PM)
John -- 67 Mustang Coupe 390 5 speed
Posted by Bolted to Floor  3/22/2019 11:21 PM | #83 |
I borrowed a speedometer to learn how to reset the mileage. After watching a you tube video, it wasn’t that difficult. I got mine out of the car and set it to the mileage it should be from getting it running. Easy peasy.....then I blew out some dust that I saw in the mechanism. I didn’t use an air hose or can of air, more like use your mouth to blow out a candle!!! Saw some stuff fly out, did it again, more stuff.......turns out the stuff was the numbers from my trip meter!!!! ![]() Sent the speedometer and clock from the instrument cluster to Rocketman’s Classic Cougar for repairs. Bob is great to deal with, best through emails. Always a prompt response to questions. And the items come back packaged extremely well.
Sent the speedometer and clock from the instrument cluster to Rocketman’s Classic Cougar for repairs. Bob is great to deal with, best through emails. Always a prompt response to questions. And the items come back packaged extremely well. 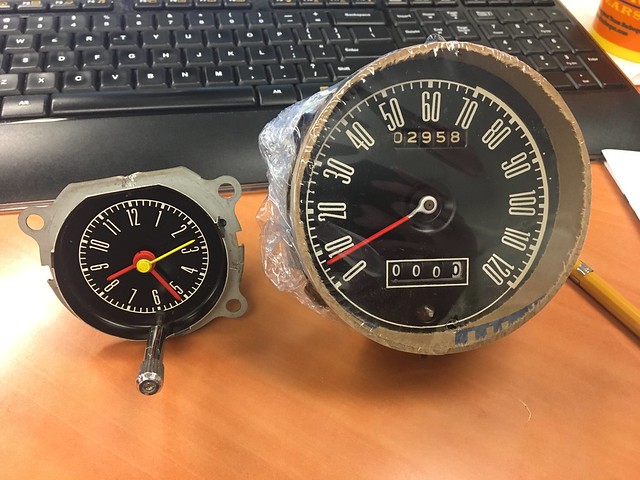
Pic 9001

Pic 9003
I will have to change the mileage again since I drove the car another 80 miles or so with the borrowed speedo.
Last edited by Bolted to Floor (10/10/2022 9:14 PM)
John -- 67 Mustang Coupe 390 5 speed
Posted by Bolted to Floor  3/22/2019 11:41 PM | #84 |
Tire rub in the back has been an issue on the left side. The new leaf springs helped along with the little bit that I rolled the fender, but didn’t solve my problems.
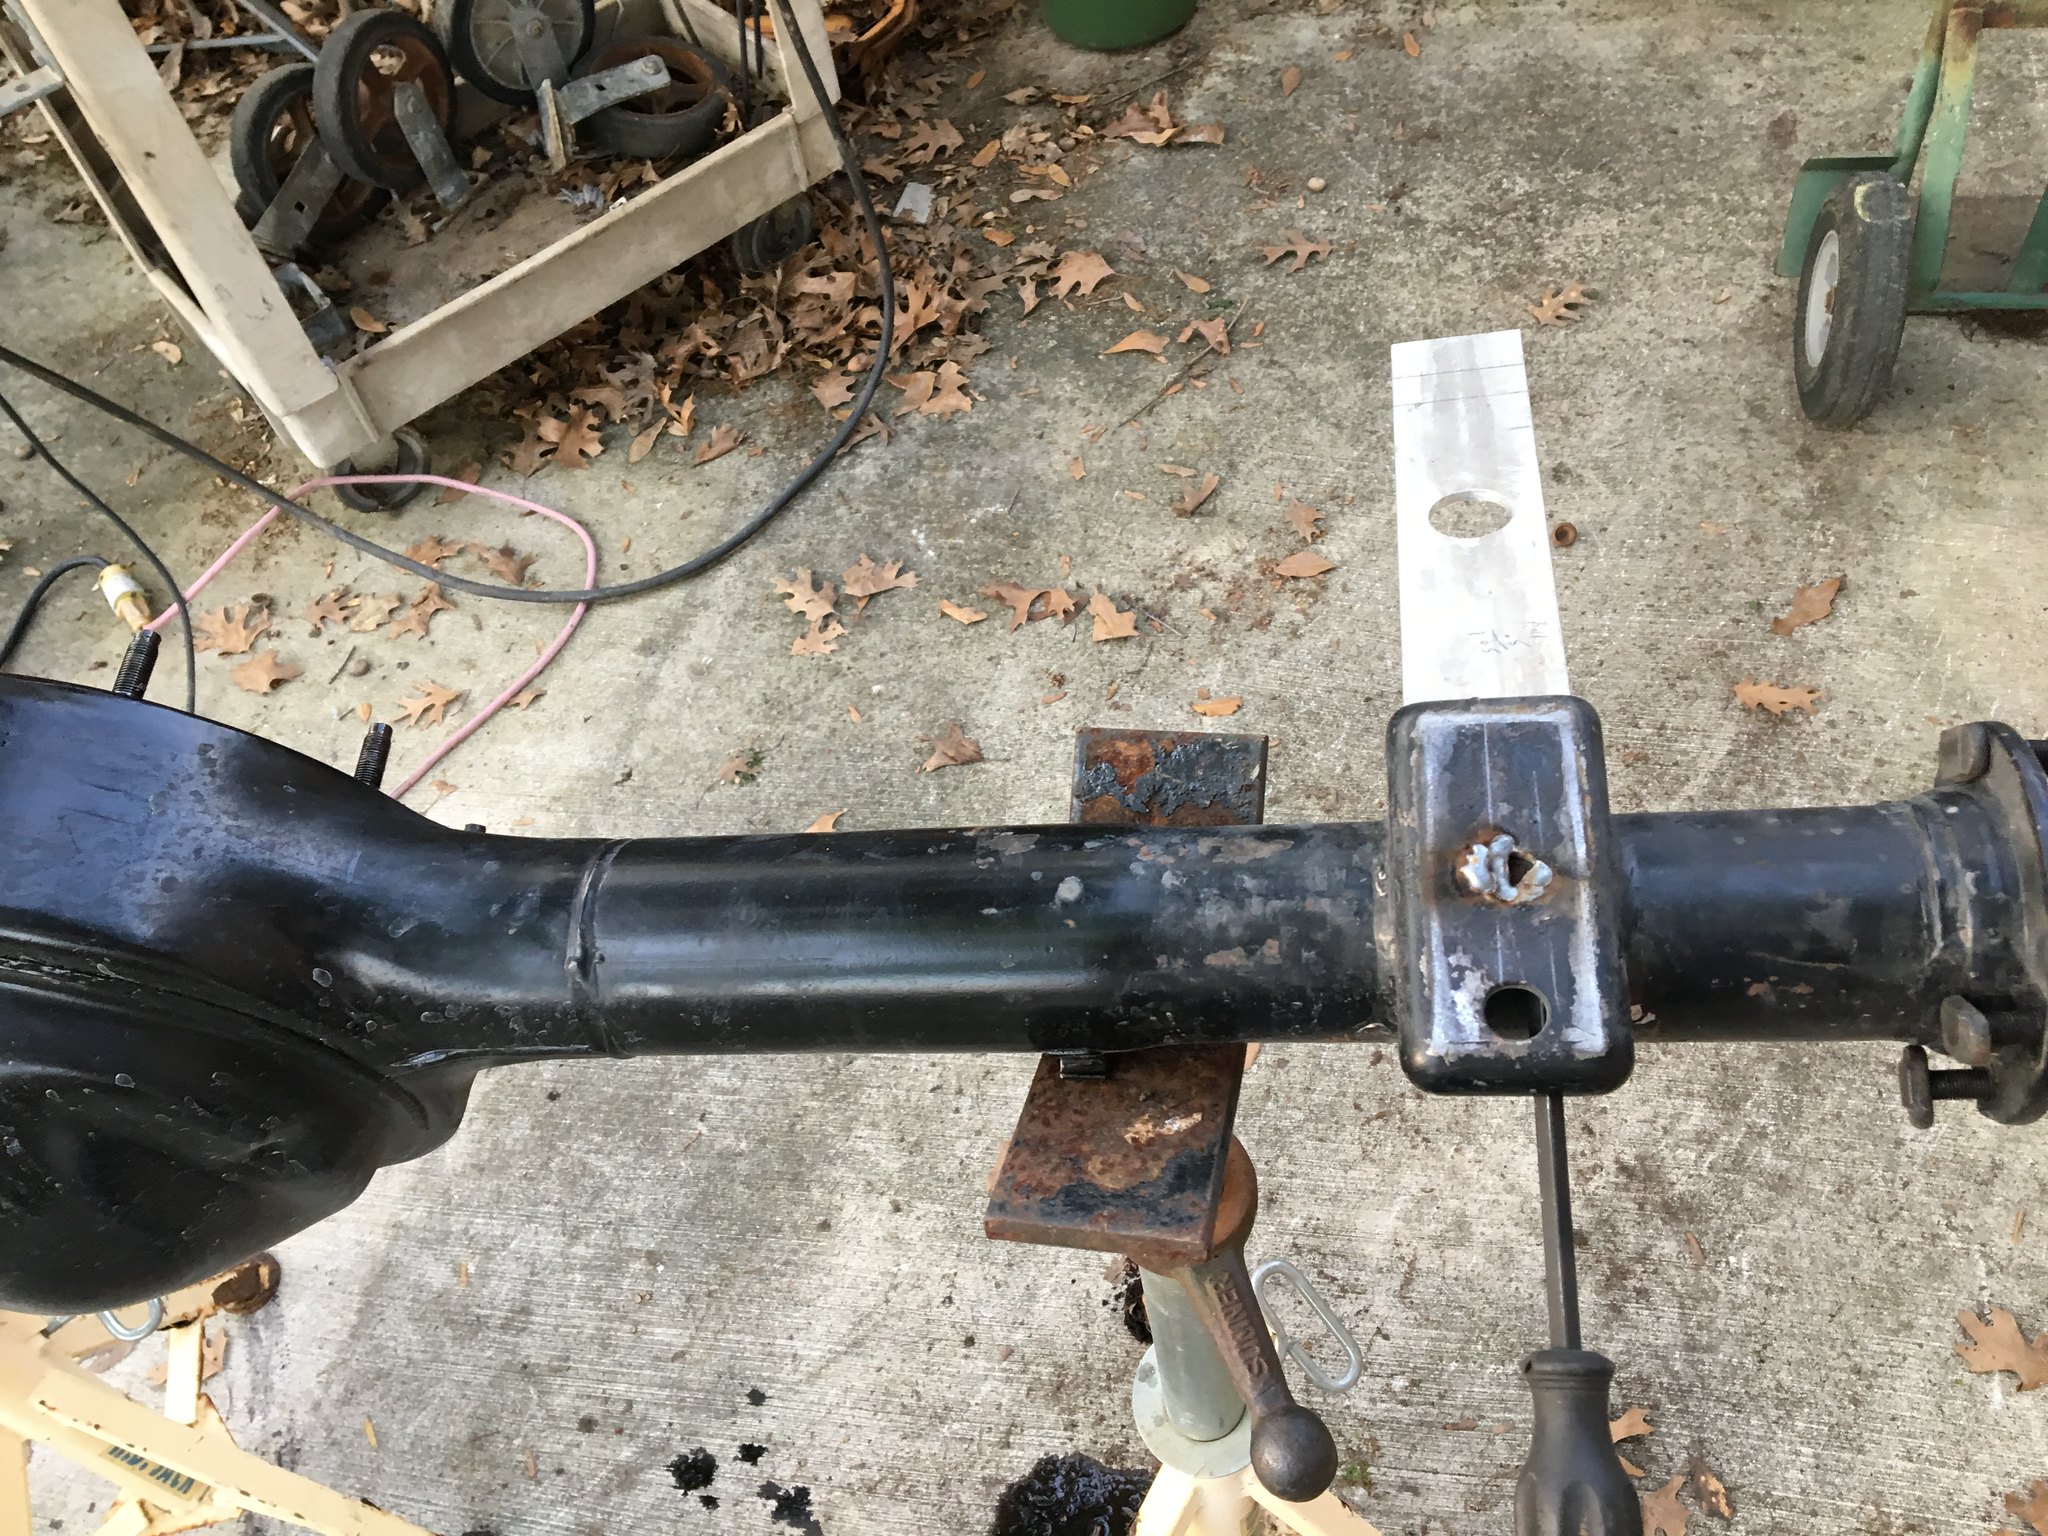
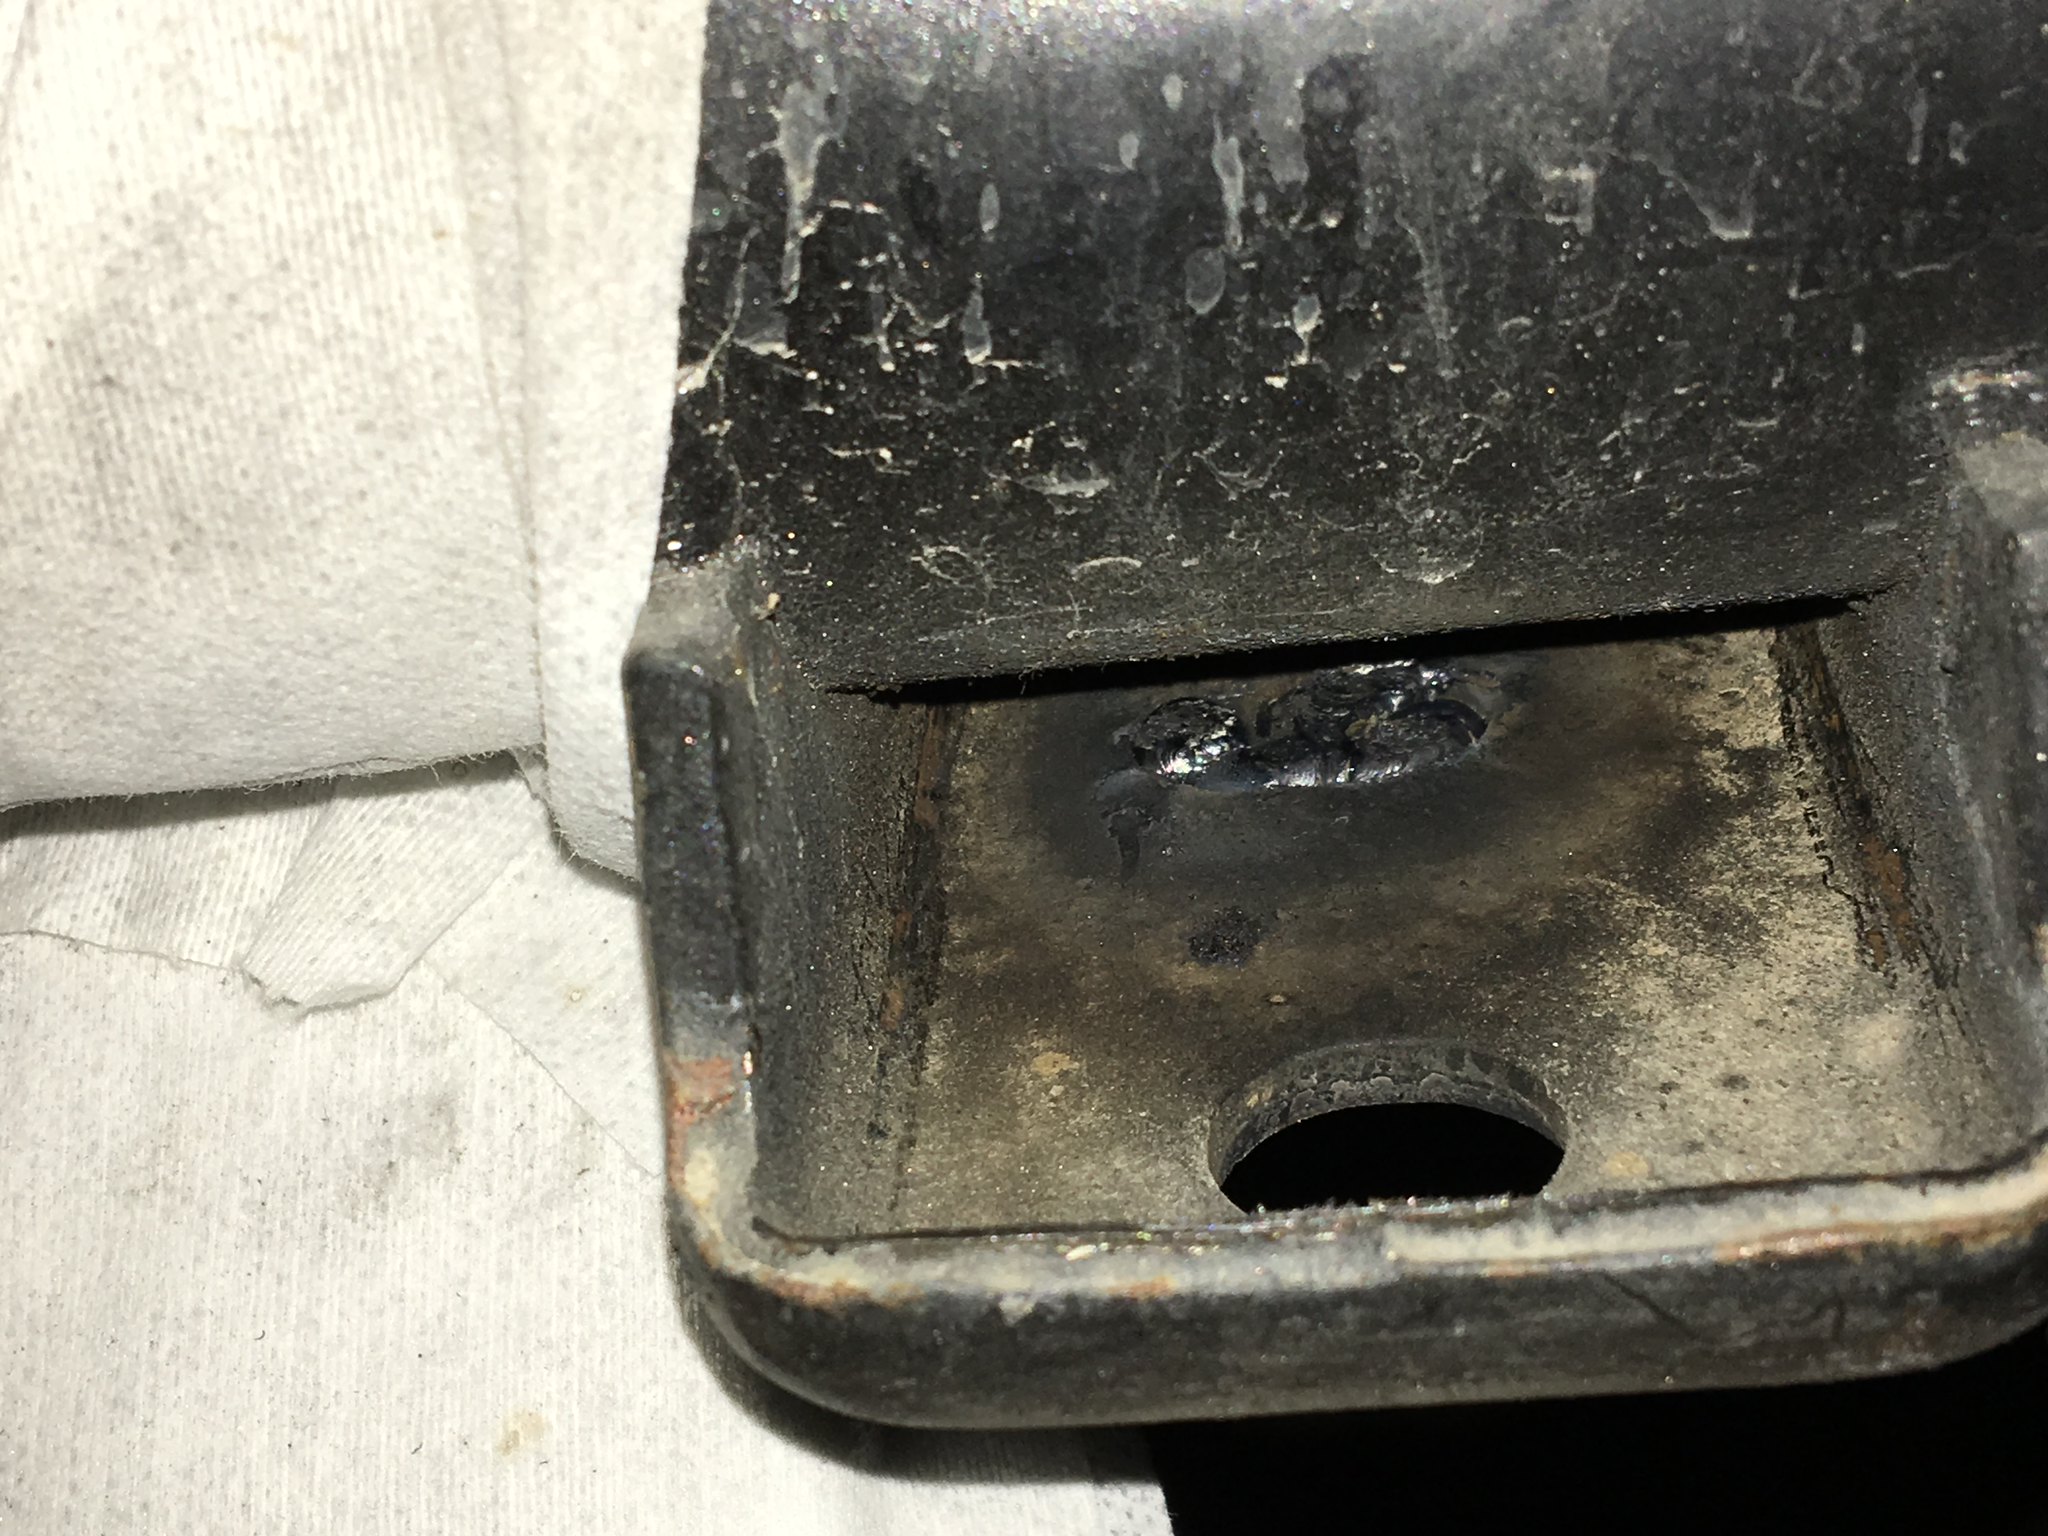
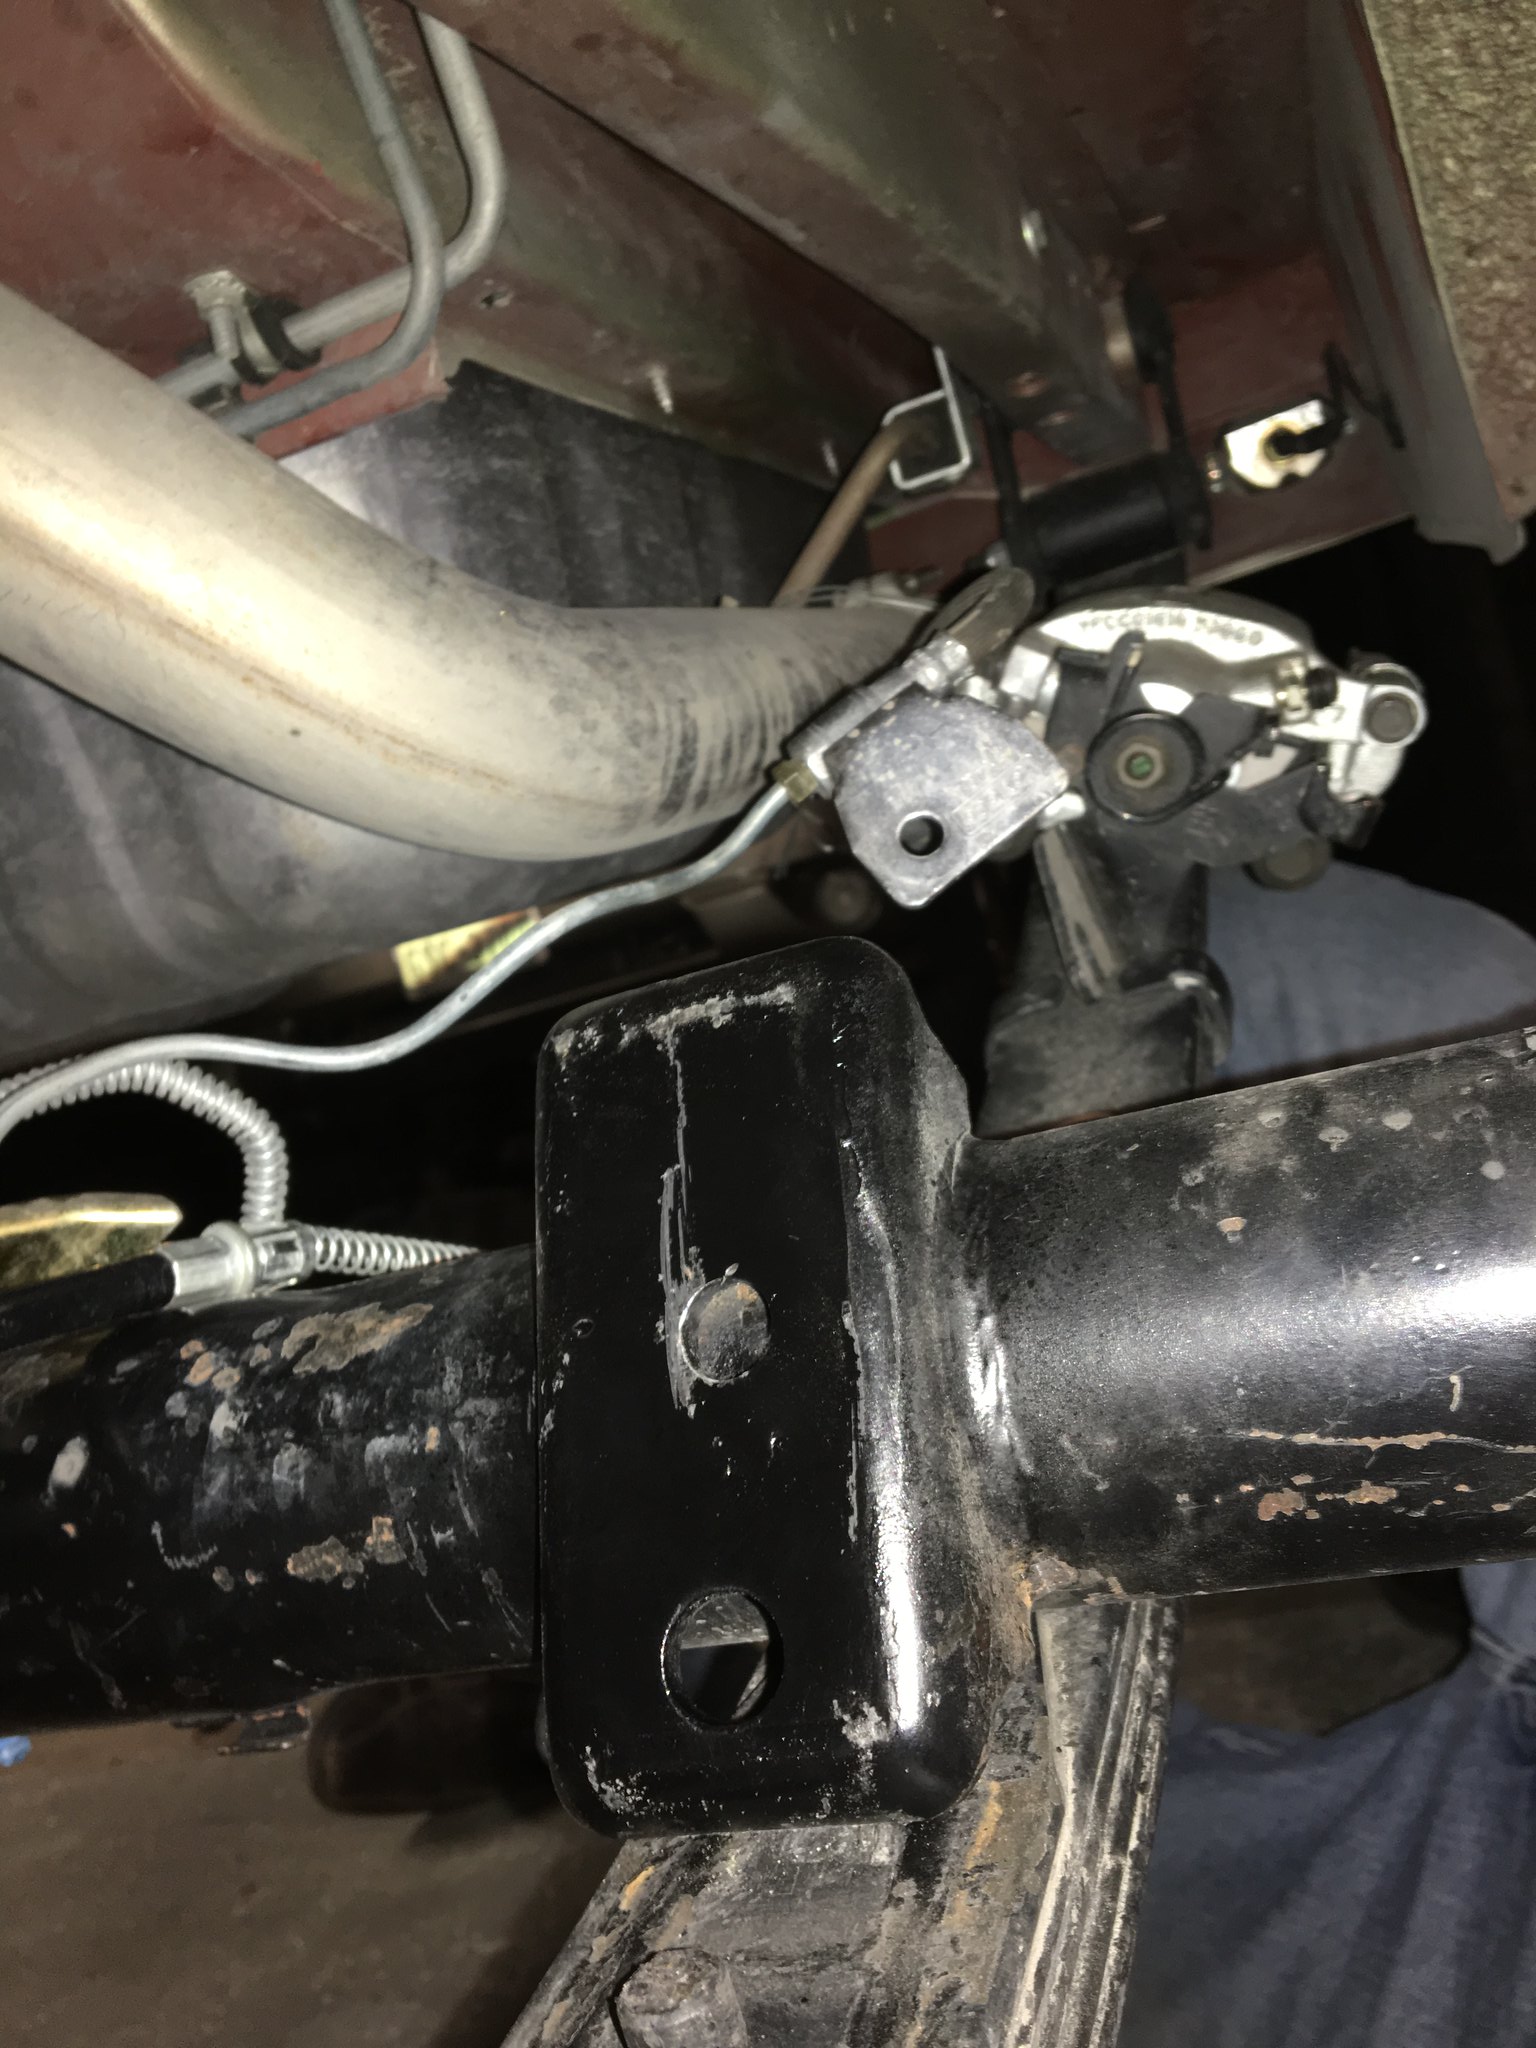
The trusty, semi rusty tape measure showed the rear end needed to shift 1/4” to the right to be centered. I wanted to use 1/2 lowering blocks that could be drilled to get the 1/4”. The downside was losing the 1/2” ride height from the blocks. After much deliberation, I unbolted the housing and rolled it to get at the alignment holes. Then proceeded to elongate them with a die grinder to get the 1/4” I needed and it helped a bunch. After driving about 75 miles, the rear end was sliding over on the elongated holes. So, I pulled the rear end out of the car and welded up the alignment holes in the perches. I’m not that great of a welder, but figured I could do this. Didn’t have any copper, but took a chance with some aluminum and wedged it against the bottom side of the hole. Was able to weld them out and keep the area in the spring perch relatively flat. The new holes to get it centered are drilled. The housing is bolted back in the car now. The bottom side of the car is not clean like it used to be!! I guess that happens when you get to drive it.
While I was trying to decide the best way for me to solve the problem, a buddy at work asked if the mounting pad of the rim could be machined down!! A call to American Racing, and the Tech guy says “yes, it can be machined“. They recommended Baker Blackie Machine Works here in town for the machining and the shop would make the best determination on how much could safely be machined off. The pads are about 11/16” thick, then you subtract the recess for the acorn lug nuts. Which leaves around 1/2”. I settled at taking off .125”. He said it could go more, like up to .200, but it looked like it would be really thin to me. Much more than the 1/8” would have caused issues with the back side of the rim hitting the front calipers. Had all four rims machines. It was a reasonable price and he was spot on for when they would be ready. For what you see of the lug bolt hole, it’s about 3/8” thick to the recess for the acorn nut.

Between centering the rear end and machining the wheels, I hope to be rid of the rubbing. If this doesn't work, I will be forced to roll the fender lips a good bit or convince my wife I need more rims.
Next project is the third member. It was well used and probably abused when I got it, but figured it would get me moving. Loaded it up in the bench vise for inspection. The manual said check back lash in several places, should be .008-.012. Mine ranged from .009-.016!! I can see a ridge toward the valley on the pinion gear too. I will be buying bearings, gears, and plates for the traction lok unit to get it back together. Haven’t pulled it all the way apart to inspect the spider gears yet.
John -- 67 Mustang Coupe 390 5 speed
Posted by rpm  8/11/2019 9:03 PM | #85 |
Bolted to Floor wrote:
Thanks Coupe,
After my wife got tired of watching me spend so much time looking for parts that I’ve bought over the years. She had this solution. I wish she would have thought about it sooner.
This is seriously ingenious! Your wife is truly a keeper. I thought it would be a great idea to install cabinets at my place. Bad idea for the reasons you already know. I can't find anything now.
Btw, just read thru your thread and I'm really impressed by what you've accomplished.
Bob. 69 Mach 1, 393W, SMOD Toploader, Armstrong steering, factory AC.
Posted by Bolted to Floor  8/12/2019 11:28 AM | #86 |
Yea, she's a keeper alright!! Marrying Sheryl was the best decision I ever made. And thanks for the kind words. I see that I am overdue for and update on the car. Hopefully I can get something added in the next month or so.
John -- 67 Mustang Coupe 390 5 speed
Posted by Bolted to Floor  1/11/2020 10:09 PM | #87 |
It’s been awhile and I’m trying to catch up with this thread.
The gears were shot along with the bearings. With parts for Steve’s Mustang and Quick Performance it was time to tackle it. YouTube videos from Cartapes were a huge help. It’s a 4 part series you can find with a Google search. He is not the most interesting guy, but he provides a lot of detail.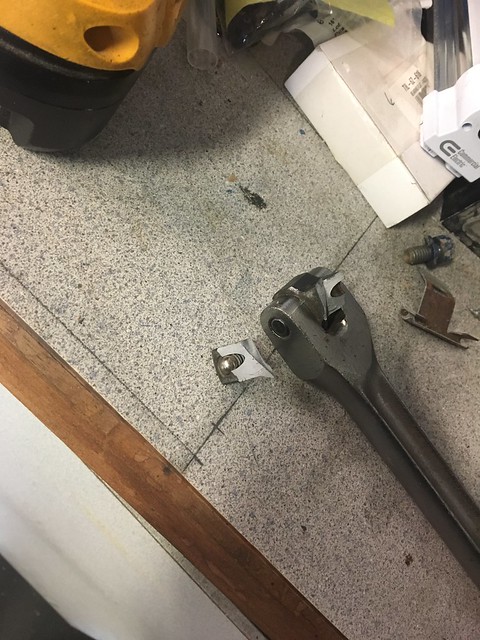
Pic 9098
Pic 9100
Pic 9136
Pic 9137
Pic 9142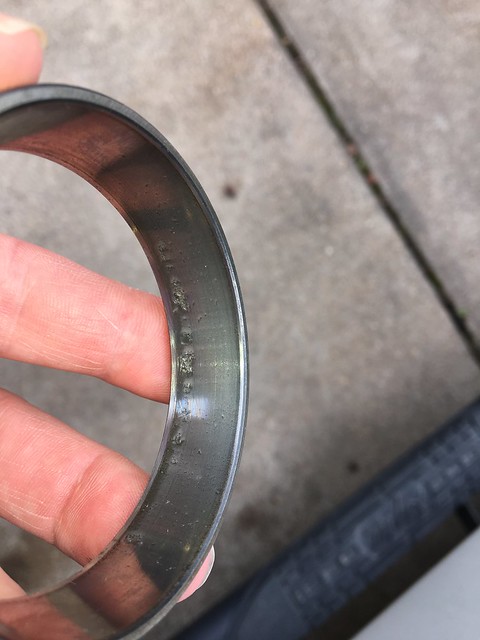
Pic 9143
My breaker bar was a casualty of the crush sleeve!!
And after all of that, the tires would still rub on occasion. ![]()
Last edited by Bolted to Floor (10/10/2022 9:21 PM)
John -- 67 Mustang Coupe 390 5 speed
Posted by Bolted to Floor  1/11/2020 10:31 PM | #88 |
With as many bugs worked out as I could get, we loaded up the car and headed for Adrian Michigan for the Mustang Steve Bash. Drove up with the Buzek’s and John Warley. I was really surprised that I got 18+ MPG out of a couple of tanks of gas. The car drove great and never gave us a problem. It built up my confidence for the drive home since we were going to be flying solo.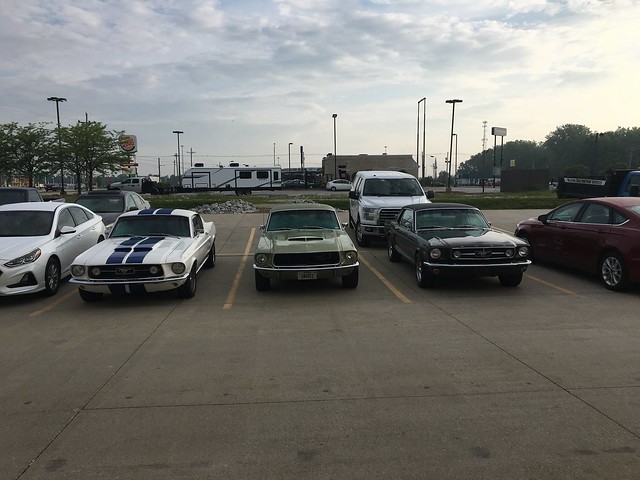
Pic 9642
We stayed one night in Brazil Indiana.
Pic 9648
A rest stop along the way.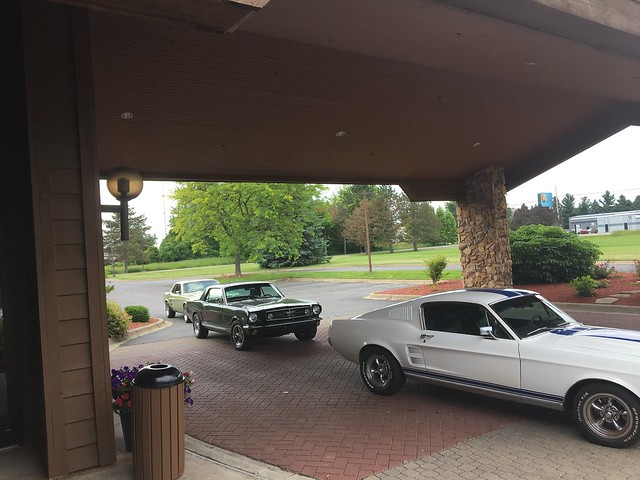
Pic 9649
Checking into the Bash hotel.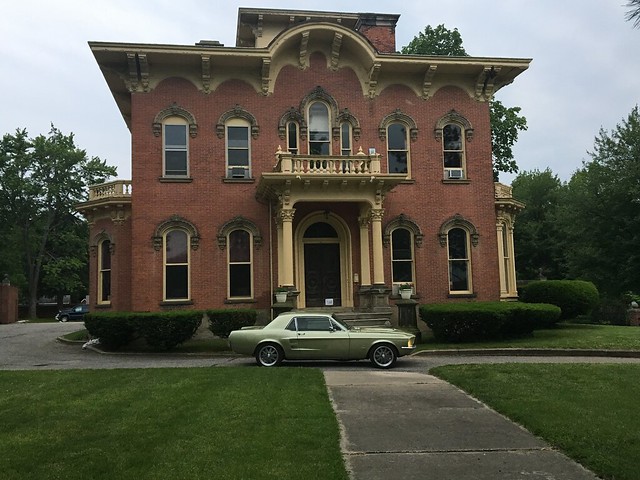
Pic 9654
This was a cool looking old house that was converted to a business.
Last edited by Bolted to Floor (10/10/2022 9:27 PM)
John -- 67 Mustang Coupe 390 5 speed
Posted by Bolted to Floor  1/11/2020 10:45 PM | #89 |
We got to the hotel a day early to see some of the sites. On Friday, we drove into Detroit to the Henry Ford Museum. That place was cool. Lots of stuff to see other than cars.
Pic 9724

Pic 9776 and 9777
It was a great turn out of cars and people.
Pic 9790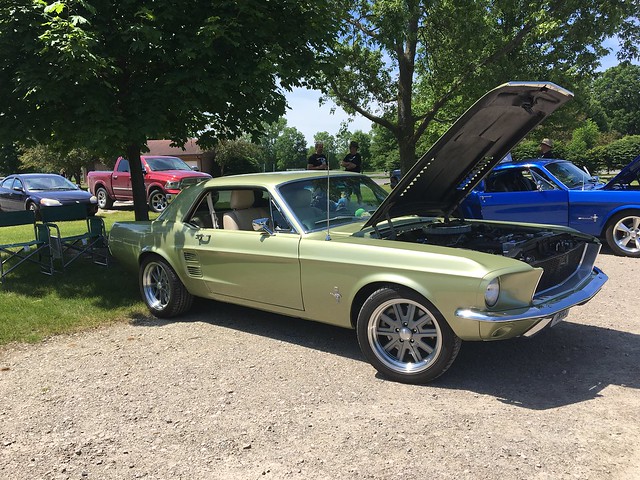
Pic 9809
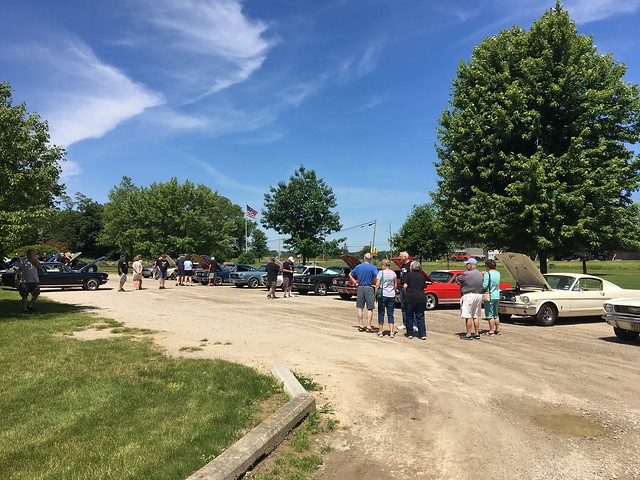
Pic 9793
Last edited by Bolted to Floor (10/10/2022 9:35 PM)
John -- 67 Mustang Coupe 390 5 speed
Posted by Bolted to Floor  1/11/2020 10:59 PM | #90 |
The day after the Bash, we drove back to Detroit to drive through downtown and look at the old buildings. It’s great to see the architecture and how they used to give the buildings some character.
Driving the streets around the Henry Ford Museum, we found a place to stop and get a picture.
Pic 9834
Had lunch at the Ford Restaurant and found this Fairlane to park next to.
Pic 9835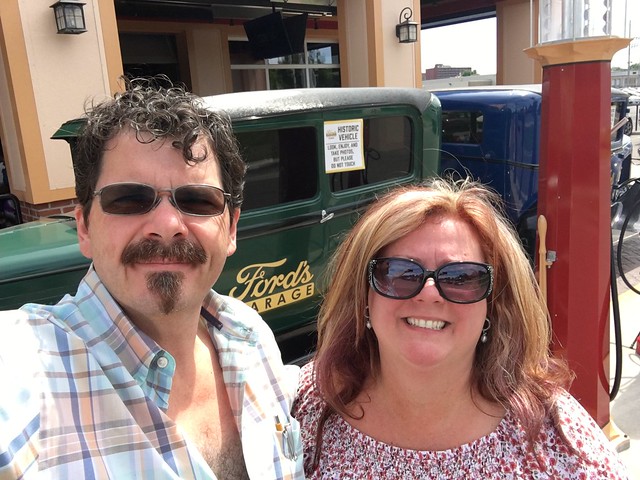
Pic 9847
The next planned stop was Indianapolis for the night so we could see the speedway museum. Less than 20 minutes later we were on side of the road. ![]()
Last edited by Bolted to Floor (10/10/2022 9:37 PM)
John -- 67 Mustang Coupe 390 5 speed
Posted by Bolted to Floor  6/02/2024 11:32 AM | #91 |
It’s time to catch up the thread, so the post dates won’t correspond with the actual time line. This took place in June of 2019
AAA is a great thing to have… especially the package that gets you 4 free tows up to 100 miles per person on the account. I reached out to the guys here on the forum via the group text we had and made post on one of the FE forums with pictures of the findings looking for some insight to what might have happened and eventually discovered. You can read all about the hotel parking lot inspection of the car here. No since doing it all twice. There are pics of some expensive motors turned into scrap iron in the thread.
http://fepower.net/simplemachinesforum/index.php?topic=7597.msg83215#msg83215
The motor made 6600 miles before it gave up.
Once home and the pan pulled to figure out what was wrong with the car, it had to sit for a while. The gas was drained from the tank and the carb then blew out the line with air. I had a house to work on and sell.
Time frame here is October to December 2019
We got moved to the new house. The car was towed to the new house just as it had been to every other house we have lived in since I’ve owned it….. I was hoping to break the cycle. Our son had a December graduation from College and Christmas was at our new place. Once all that was out of the way, I had time to pull the motor out of the car. A new block had been sourced and magged. A new stroker kit had been ordered.
I took the time to look the headers over for contact spots before the motor came out. I had several. Used a sharpie to mark them for dimpling. Pulled them, dimpled and reinstalled to check the clearance, then pulled them out again. They went out for recoating too since they were looking rough. They were on the first motor when it was dyno’d. Did know till afterwards that dyno time could have a bad affect on the coating.
I went ahead and put a bolt through the motor mount too. That was harder than expected to get it right. Wasn’t smart enough to get pics!!
John -- 67 Mustang Coupe 390 5 speed
Posted by Bolted to Floor  6/02/2024 11:39 AM | #92 |
February 2020
While the motor was out, the new crack in the shock tower was welded up. I also added the lower shock tower brace from OpenTracker. Had a friend from work do the welding since the car wasn’t real mobile and I didn’t trust my abilities here. The car got roller bearing spring perches (more on those later) too since what I had was already making a clanking sound from the bushing part being beat out in 6600 miles. Got to love the excitement of compressing coil springs!!

Pic 12376

Pic 1334

Pic 8748

Pic 1258
The Internal Parts I could reuse? The timing chain!
Once it was out of the car, I was able to get it apart. Due to the shiny surface on the crank throw I suspect it had a major crack for some amount of time before it broke. The crack could have a path of least resistance for the oil causing starvation that took out the cam, roller lifters, and rocker arms.
New rotating assemble, cam and Morel roller lifters from Brent. The machine shop did the block prep and assembled the short block. The heads got inspected since it looked like both had been kissed by position in the busted motor. I finished the top end. l I swapped over to non-adjustable refurbished rockers from Rocker Arms Unlimited with bronze bushings on new shafts. I added another sender to get a real oil pressure gauge. It runs really nice and made 486 HP and 525 FT# of torque. What was a little disheartening was the low oil pressure at hot idle and the front seal leaking, twice. When I got the front of the motor apart the second time, I spun the oil pump with a drill and had an oil stream hit the condenser. Turns out the machinist had drilled very small holes in the oil plugs for the lifter passages at the front of the block. One dumps on the distributor gear and the other shoots the stream into the timing chain cover. He said this was how he had got rid of the ticking sound from the lifters in other FE motors. At the distributor gear, I staked the hole with a punch till it turned to a dribble on the drill motor. The other was replaced. My oil leak went away but did not increase the pressure at hot idle. I replaced the standard pressure/volume pump with a Melling 57B pump for standard volume, but slightly increased oil pressure. Cold pressure at idle is 65 psi and hot idle is about 12 psi using a digital gauge that gets calibrated yearly. Going down the road is around 30 psi. At some point in the future I will pull it to figure it out the issue. For now, I will live by the adage of 10 psi per 1000 RPM.

Pic 1267
Pic FQQD3276

Pic 1344

Pic 1442
https://youtube.com/shorts/ml1ln2Cj74k?feature=share
1444 MOV on Youtube

Pic 620

Pic 1625

Pic E1631

Pic 1635

Pic 1648
Motor #2 again, wider angle Youtube link
John -- 67 Mustang Coupe 390 5 speed
Posted by Bolted to Floor  6/02/2024 11:47 AM | #93 |
Turns out I needed the off set dowel pins to align the QuickTime bell. I ordered them from Robb McC then had some fun getting it all lined up, The mica board protecting the garage floor was easy to use as a note pad. Kept tweaking till it was right enough.
Pic 1704
The motor got stuffed back in the car over Mother’s Day weekend with help from my lovely awesome wife.
PIC 1662
Frontend alignment after new motor in 2020
With the work on the front end, it needed another alignment. Took it to the shop that performed the first two. Number three test drove well enough, but never felt quite right at speed on the freeway. I never took it back to discuss, so that’s on me. I did start to notice tire wear on the outside edge of both front tires.
Headlight upgrade June 2020
On the trip to Michigan, I had a headlight fail that needed to be replaced. New halogen installed in Brazil Illinois. Lost another one running around Houston. Time to upgrade to something better. Bought the Hella glass housings, H4 Halogen bulbs, and new ceramic headlight sockets. They shine a lot better than what I took out. They could still use some adjusting though.
Gas smell from exhaust
With the new motor, it smells like a lot of gas is going out the exhaust…. to the point it will burn your eyes. I bought the book by Vizard about carbs. I read all of it once, a lot of it twice and some of it three times. Some of it I understood. I decided I’m lousy at carb tuning. I asked some questions and got some advice of upgrade the ignition system to something hotter. Current parts are Duraspark distributor, Blue Streak coil spec’d for 76 Ford with FE motor, Blue Streak cap & rotor the blue grommet box, MSD plug wires, and Autolite Platinum plugs. Time to upgrade the ignition? Maybe, but to what? This leads to a questions I need to ask.
Is my ignition system enough to burn the gas?
Are the platinum plugs a plus or minus in this case?
Would a hotter coil only be beneficial? Like what they installed on the fuel injected 5 liters from the factory?
How reliable would a MSD box be traveling the roads? Would you consider it reliable enough for a daily driver?
I like the idea of being able to buy parts from the local parts house if I’m out on the road.
John -- 67 Mustang Coupe 390 5 speed
Posted by Bolted to Floor  6/02/2024 11:50 AM | #94 |
Vibrations from rearend
The problem I had driving to and from the 2018 Bash was excessive tire rub on one side. I also noticed a howl from the rear end. Then there was some spirited acceleration that caused the leaf springs to bend unnaturally. So…. It was pulled. I bought, set up, and installed the new gears. I welded the centering holes in the spring pads and then re-drilled to get the housing centered and installed new 4.5 leaf springs from Mustang Plus. I think its about this time in late 2018 that the vibration began.
9136

Pic 9143

Pic 9041

Pic 9100
Prior to the 2021 Bash in Rockwall Texas and my lousy job on setting up the gears
I didn’t want to drive to the Bash with the vibration so I tried to figure out what was going on. I checked run out on the rim and axle flange. I don’t remember the numbers but both were in tolerance for the refences I could find. The next thought for determining the source was questionable!! With the rearend on jack stands in the garage, it was time to get past the fear of taking it up to speed. First attempt was a complete car. Nothing like doing 75 for very short intervals sitting on jack stands. Pulled the back tires, secured the rotors and did it again, vibration. Pulled the calipers and rotors, vibration. Pulled the axles, vibration. Its down to the chunk and drive shaft. Pulled the driveshaft, no vibration, but nothing is turning but the output shaft of the transmission.
Pulled the chunk and took it to Glen with rose Hill Performance for inspection where he determined I did a lousy job on the gears. Not enough preload on the bearings and too much backlash. The gears didn’t have that any miles, so he got them corrected.
Narrowed rearend just before the Rockwall Bash 2021
Since the rear end was already apart, Glen and his brother Steve narrowed it a ½” per side. They were able to reuse the existing flanges. The Jegs axle shafts had enough splines to allow for the cut off. This has finally solved all my tire rub issues in the back. If I would have thought about it a bit more, the housing would have been cut to allow for the spring perch holes to be redrilled in the center of the pads. I was not so lucky with the vibration, its still there.

Pic 3524

Pic 3532

Pic 9269

Pic SOO17786
The week before the Mustang Steve Bash the car was back together. The day we were supposed to leave for the Bash, I took the car for a front-end alignment at a new shop. As I’m trying to back out of the driveway, the car feels like there’s a brake hung up. After a few minutes of looking and not seeing anything out of place, the executive decision of “screw it” is set in place, and I get it out of the driveway. I happened again at the alignment shop. While it’s on the machine, they see I am missing a bolt for one of the rear brake calipers…. DUH. Now it makes sense. With a test drive, the alignment is marginal and I have more changes in mind anyway….. just need to convince the wife to let me do it. (This finished of the front tires). I did find the missing bolt in the driveway when I got home from the alignment shop. Car is packed and we are headed to Rockwall Texas for Bash 18. As we roll up I-45 at 72 MPH cause the vibration starts at 73!! It was great to see all the folks again.
We got there on Thursday and headed home after the Bash on Saturday. We missed the after-bash party. With the weather forecasting rain, we taped up the front and back glass before heading home. Good thing too, it rained about half the way home.

Pic RWDP6787

Pic 3567

Pic 3559

Pic 3558
The rest of 2021 was spent tooling around in the car whenever we wanted.
John -- 67 Mustang Coupe 390 5 speed
Posted by Bolted to Floor  6/02/2024 12:39 PM | #95 |
Moving 2022 and front control arms in 2022
We moved in 2022 and for the first time in 33 years of ownership, I drove the Mustang to the next house!! Huge milestone. With the front tires showing threads, it was time to replace them and get another alignment. I like to watch people work. It can be fascinating…. It can also prevent stupid things happening, like the Tire Tech running the jack under the car with no regard for jack placement. After a deer in the headlight look, I placed the jack for them.

Pic 6274

Pic 6275
It’s a great time for the new control arms too. They came from OpenTracker. These have a pie shape cut out at the ball joint. It makes enough of a change to pull the top of the tires in about a 1/4”. I got them installed a few weeks prior to my daughter’s wedding. Had to pull the valve covers to get to the cross-shaft nuts. Got to love a shock tower car with a big block!!

Pic 6147
Pic 6195
Pic 6193
Decided to inspect the roller spring perches bought from Amazon (these ARE NOT Open Tracker products) since I had it apart.. They had endured about 5000 miles and have rough spots in the range of motion where they normally operate. The Engineer I used to work with told me it was a bad idea to install a roller bearing in a service where it was not able to make a complete revolution. I proved him right. They got re-installed as is. I did get pics on the bearing numbers for possible replacement at a later date. I needed the care mobile again. Not sure if the rough spots are very evident in the video.

Pic 6206
https://youtu.be/xME1Y0pOeK0
6210 MOV
Drove it to work the next days and was thoroughly disgusted. Now the dam thing has a miss!! That turned out to be the easy fix since I failed to get all the spark plug wires back on!!

6512
Just the changes to the control arms moved the toe in to 9/16”. I did a tape measure alignment the morning of my daughter’s wedding. It was a great day. Both of our girls are now married and I was able to have the car there for some pics.
Found a good shop in Baytown to do the alignment. The car felt good at speed. He did tell me one of the eccentrics is starting to round off/slip. Got a new Moog set and will have the back side welded to prevent it in the future.
John -- 67 Mustang Coupe 390 5 speed
Posted by Bolted to Floor  6/02/2024 12:40 PM | #96 |
Mustang Steve Bash #19 2022
The Bash was in Vandalia Illinois. It took us 2 full days to get there. The car never missed a beat and we stayed in the slow lane around 72-73 MPH. We had a great time seeing everyone. We got to tour the old Capital building too. They brought back the spark plug changing contest. I barely won. Bullet Bob built a trophy that is now proudly displayed at work. Part of the winners responsibility is to build a trophy for next year! We took another 2 days to get home. We drove through St Louis on the way home to see the Arch. That was pretty neat. The only real issue with the trip was oil getting pushed out of the valve cover at the PVC fitting. Added the steel scrubber pad to the baffle and that problem went away.

Pic 7028

Pic 7039

Pic 6721

Pic 6738

Pic 6743 Parked around town square for dinner

Pic E6741
https://youtu.be/_9QJGtKCQQE
7058 MOV
This may not seem like a lot, but we had gone through the eliminations already for 16 to 20 people. The final was the best 2 out of 3. We were both tired at this point. We all had a lot of fun doing it.

Pic 6770

Pic E6745 I don’t remember who was there first!! I think I parked by the cobra to make it look even better.

Pic 7081

Pic 7127
John -- 67 Mustang Coupe 390 5 speed
Posted by Bolted to Floor  6/02/2024 12:41 PM | #97 |
Mini Bash January 2023
I wanted Glen to look at the chunk again. I didn’t really think there was anything wrong with it, but I wanted it to have one more once over. I took it to them and Steve lent me a 3.25 chunk to run. Going for a test drive, no vibrations at 73-74 MPH. Hallelujah. They started at 80! @#$%$#@@
80 is more acceptable. Its making me think there is something with the driveline angle or the center line of the motor/transmission and the rear end housing.
Drove it to Corpus at close to 80 for a few days with Mustang Steve a few other retired guys. I was the only one still working for a living. We toured the Lexington and got pics of the cars with the ship in the background. It was fun to visit and hang out.

Pic JIVN5022

Pic 7647
After the mini bash, I spent some time under the car with a laser level. I determined the center line of the motor and transmission is off about ¼” with the housing centered in the car. Not sure if this adds to it or not.
Ross mentioned something about a drive shaft and its speed that sent me digging for info about driveshaft speed vs its construction. I talked with the folks that built the drive shaft years ago but they couldn’t give any specifics about wall thickness. They did tell me the typical balance speed is less than what would be turning when the vibration begins. I will have to do more digging.
Add info about shaft speed for both gear sets. I need to find that sheet.
I’ve didn’t alter the ride height of the car, so its hard to believe the springs would make difference. I am seriously thinking about installing another set of used factory springs to see if there is a change. Along with moving the housing to be offset to the one side again.

Pic 7480

Pic 7477

Pic 7481
John -- 67 Mustang Coupe 390 5 speed
Posted by Bolted to Floor  6/02/2024 12:48 PM | #98 |
2023 Pre Bash Activities
I had a lot of fun building the trophy with Steve and Glen Buzek. It was a collaboration of thoughts and Steve’s welding abilities. The welding was completed in a day at the shop then a few more afternoons for paint and detailing. I didn’t realize it was going to be so heavy.

Pic 8580
The car got new mufflers!! We were out riding around. Had run some errands and made the local car spot on Friday night. Did several more stops after that. I didn’t realize the carb was leaking down the intake. I was nice and quiet around 9 at night when it back fired out the exhaust and ballooned both mufflers.

Pic 8399

Pic 8400
John -- 67 Mustang Coupe 390 5 speed
Posted by Bolted to Floor  6/02/2024 12:51 PM | #99 |
Mustang Steve Bash 2023-20th Anniversary
The 20th bash was in New Braunfels Texas so the ride was somewhat short. I had a lot of fun hanging with the guys on Friday. Since it was so close, two of the kids and there significant others were able to attend. Gave my son-in-law a name tag and pen. He has never been very fond of a crowd so it should have been no surprise to see his name wrote in a #4 font on the tag!! I thought it was hilarious. I really wanted the trophy for the spark plug changing and somehow managed to win. Next years trophy will be a lot lighter. There was a guy from that got some nice footage of me and a bunch of others leaving that he posting to Instagram.

Pic 5033

Pic 5036

Pic 8582

Pic 5043

Pic 8583
https://youtu.be/ZNiwvOiZt6U?si=579Jw356ZoancaLC
Daze Video
Life in the rat race took over after the Bash. I work on pipelines and our suite of assets was sold. Bash day was my first day with the new owner. Been drinking from a fire hose ever since trying to get up to speed with policy and procedures which left little time for the car.
John -- 67 Mustang Coupe 390 5 speed
Page:

